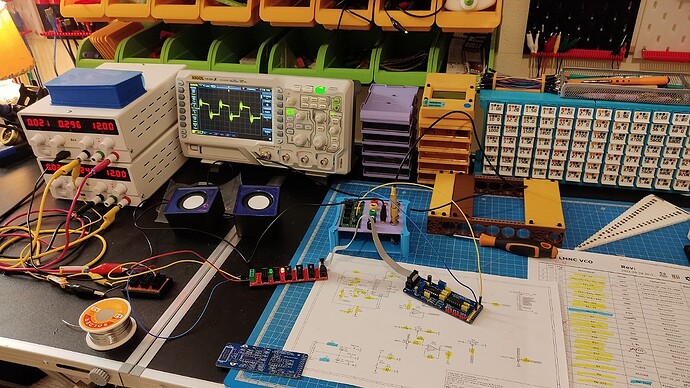
Built the Befaco Even VCO. Not properly tested, that’s tomorrow’s job =D checked for shorts and all seems good.
https://www.instagram.com/p/CnTEuItIL5h/?igshid=MDJmNzVkMjY=
Just throw those knurlies away right now, because if you use them you might decide you want 100 more of them and my god they’re expensive. And I need another 100 more.
It goes through the op amp set up as an inverting buffer twice! Here’s my redraw:
The problem with those circuits is that it’s becoming damn near impossible to find a suitable AC-AC wall wart. Best offers are like €15 + €8 intl shipping for 600mA. I intend to go the Mean Well route instead.
I wonder if you could DIY knurlies by using double-ended M3 rods (threads on both sides) and M3 heat set inserts, and 3D print a head that takes a heat set insert, with a drop of super glue going into the insert before fastening one end of the rod.
maybe this can fix your problem (at the end of this topic)
I’m gonna save them up and use them like Caps from the fallout series when the synthpocolypse hits. XD
I’ve only got wooden rails anyways, for now =D
I really enjoy the music on that light demo.
Thank you ! the sound recording with my old camera is really rotten (we hear the sound of my parquet as much as the sounds of the modular, it was mainly to realize the visual), but I think I’m going to record a clean track with this patch
I spent this week learning Daisy and better C++ to make a higher fidelity version of that. With additional bitcrusher to get the crunchy sound of that Arduino Nano -version. Then I should design a pcb for that, now it’s controlled with just midi CC:s, which also seem to crash it sometimes. I’m not sure is the problem my code or the underlying midi library.
Wooo the Even VCO works! Still needs calibrating fully though. Lining it up to the 1222 and it’s not quite in tune with it.
But hey it works and noting went up in smoke =D
thats always a nice thing !
Another iteration of my 3D printed/IKEA Eurorack design…
Changes from the first version:
- Now 40HP instead of 41HP, both to have a more sensible number of HPs (what idiot would decide to use a prime number for a width, eh?) and provide some space for side rails.
- Side rails now exist instead of butting up to the wood, although I realised I could’ve done it in a much better way after the fact (so the third version, expected in a few months, will be amazing).
- Dead space at the top and bottom has been set up to accept jacks and/or pots for things like passive/active muxes, attenuators and other handy utilities. Two blocks of five were probably less sensible than blocks of three or four when you think about the planned use case, so version three will be a bit different here as well.
Hopefully I’ll be happy enough with version 3 to open source it, because both existing versions are more than usable as it is (and cheap with it) proving that the idea is sound. I just want to finesse it a bit!
Incidentally, version 1 has been branded with The KLF logo. A daft idea after a conversation about wine boxes that I couldn’t let go of!
Looks like copyright infringement, I’m not sure the justified and ancient would approve of that sort of thing…
I’m part of the KLF Re-Enactment Society, it’s legit ![]()
Wow, I’ve heard of wood like filament, but this looks amazing ![]()
When are you burning the £1M ??
Experimenting with 3d printed rails. This is this system, which has no feedback / makes yet:
https://www.printables.com/model/334520-modular-eurorack-rails
I’m hoping to build a little test case, something I can use in the short term as my main system, then later, as my benchtop test system. What I’ve got in mind:

I’ll let you know how this system works out in more appropriate threads for that as I print and assemble more pieces.
I’m starting small and left 50p on the radiator in the bathroom ![]()
That looks excellent! Much fancier than mine
I assembled those things immediately after receiving them.
The busboard is working perfectly. I’ll share my edit of the original PCB upon request, it’s a very trivial edit and uses a nightly version of kicad and i don’t like polluting the commons too much with trivial edits. Plus it’d be a bit of effort to clean up and document haha.
The 3340 breakout board was easy to assemble (even assembled it before being told that build instructions existed, since no link to those was on github, haha).
I got sound output! I don’t know much yet about using a 3340, so this little board is gonna make my explorations much easier. I have three chips, and will definitely put together a pair more boards soon. One will be turned into a VCO module for sure.
Also this little raft full of trimmers was a great gift to myself I gave myself a few months ago.
And the VCO is mostly done now. Not as fully featured as it could be, I am simply exposing the PCB’s features without adding all the bells and whistles possible.I also skipped the PWM attenuator.
Eventually, I’d like to build a 3340 VCO with more features — exponential through zero fm, soft sync, sine wave output, octave selector. But for now this is more than enough. I’ll put together another 3340 board so I can experiment with those things easier.
I am starting to really hit the limits of my cardboard build, lol.


