Today I used a K40 laser for the 1st time to make a panel for a module. I’m aiming at using plywood but used some scrap cardboard to get an impression of dimensions etc. As it turns out my sketch was not too bad. Most holes are in the right place, but I’m not there yet.
And yes, the engraving on the bottom right was done with too high a power level, the cardboard caught fire … still learning …
I drew everything in inkscape and printed with k40whisperer.
My mate was talking about getting one for our shop but I’m hesitant seeing as cheap chinese gear isn’t always reliable/safe. When dealing with high power electronics, dangerous lasers, and toxic fumes, having reliable systems is very important.
Maybe a dumb question but can it cut metal? I would imagine it can engrave metal but cutting would be cool. (don’t encourage me to make a water jet cutter )
Oh, there’s an idea! Maybe do it @nervous_squirrel style and engrave anodised aluminium to expose the bare metal underneath?
BTW there’s an excellent tool called Slicer for Fusion 360 that takes a 3d geometry and ‘slices’ it into layers the thickness of your material, which can then be glued together.
Right I will stop bloviating and get back soldering
A well, almost all electronics come from China these days and if they are tested properly according to the local standards, you should be fine. If you import directly, it is best to check things yourself before using the machine.
Maybe a dump question from my side: how thick a slab of steel would you want to cut?
No, it can’t because the power level is too low.
Also engraving metals is difficult as they often refect the laser. A dark coating on top of the metal is sometimes used to remedy that. Have a look at lasergods for some more info.
Yeah, that’s the bit that I’m concerned about. I’m generally wary of high voltages coming from generic manufacturers and visually dodgy safety such as loose earthing bolts or more serious faults eg cutting corners with control boards.
(if the shoddy coolant pump fails, the laser tube cracks, a tank of water comes into contact with thousands of volts!)
I’m probably just wary after having a thermal runaway scare with my 3D printer, but it’s good to see the positive side of the story
I thought so. Ach well.
That site looks both very informative and very wallet influential. I will have a look later, thanks!
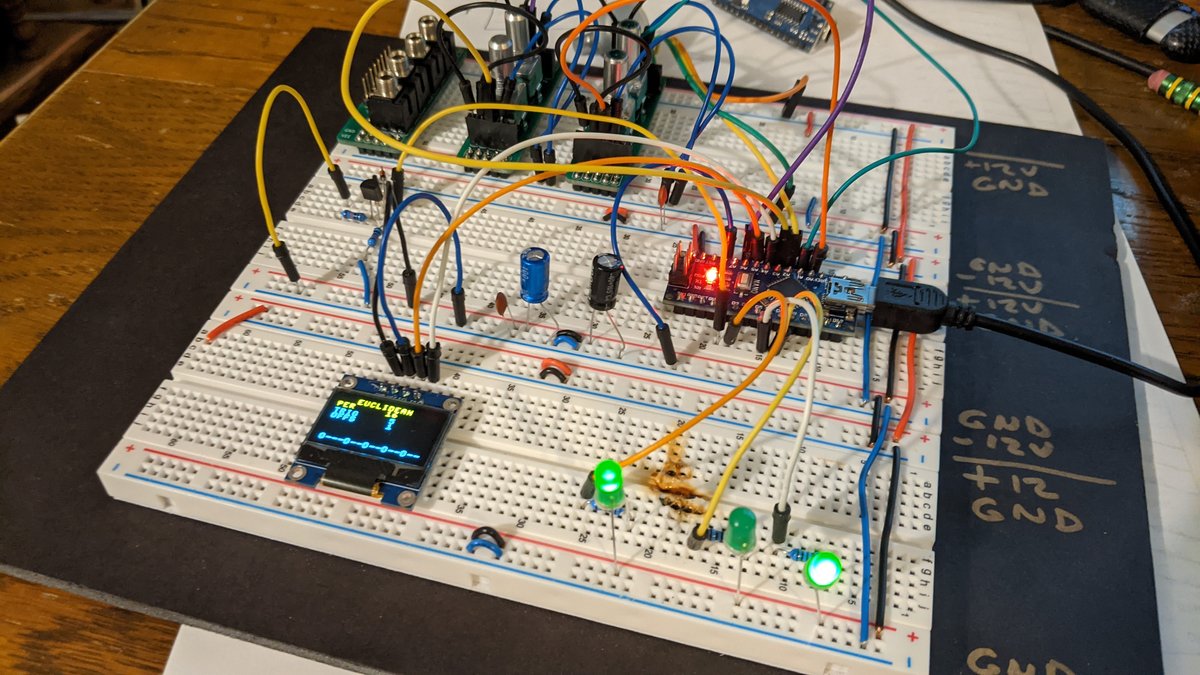
So… Today I soldered up the VCDO PCB that I designed. It works but has pops and clicks at certain frequencies, which is a known issue with this circuit. I did put bypass caps all over it and separated the analogue/digital sections as much as possible - it must be the convoluted signal paths. As noted elsewhere, 6 out of the 9 pots are backwards. D’oh.
I really don’t like the way I designed it. The components are placed in a haphazard way, there’s vias everywhere and the traces are like a spaghetti junction.
I was planning to sell these boards but can only give them away for free due to the mistakes. I’ll stick them on Tindie one of these days so if anyone wants one let me know. A redesign is in the works though with my current workloads that will be a while…
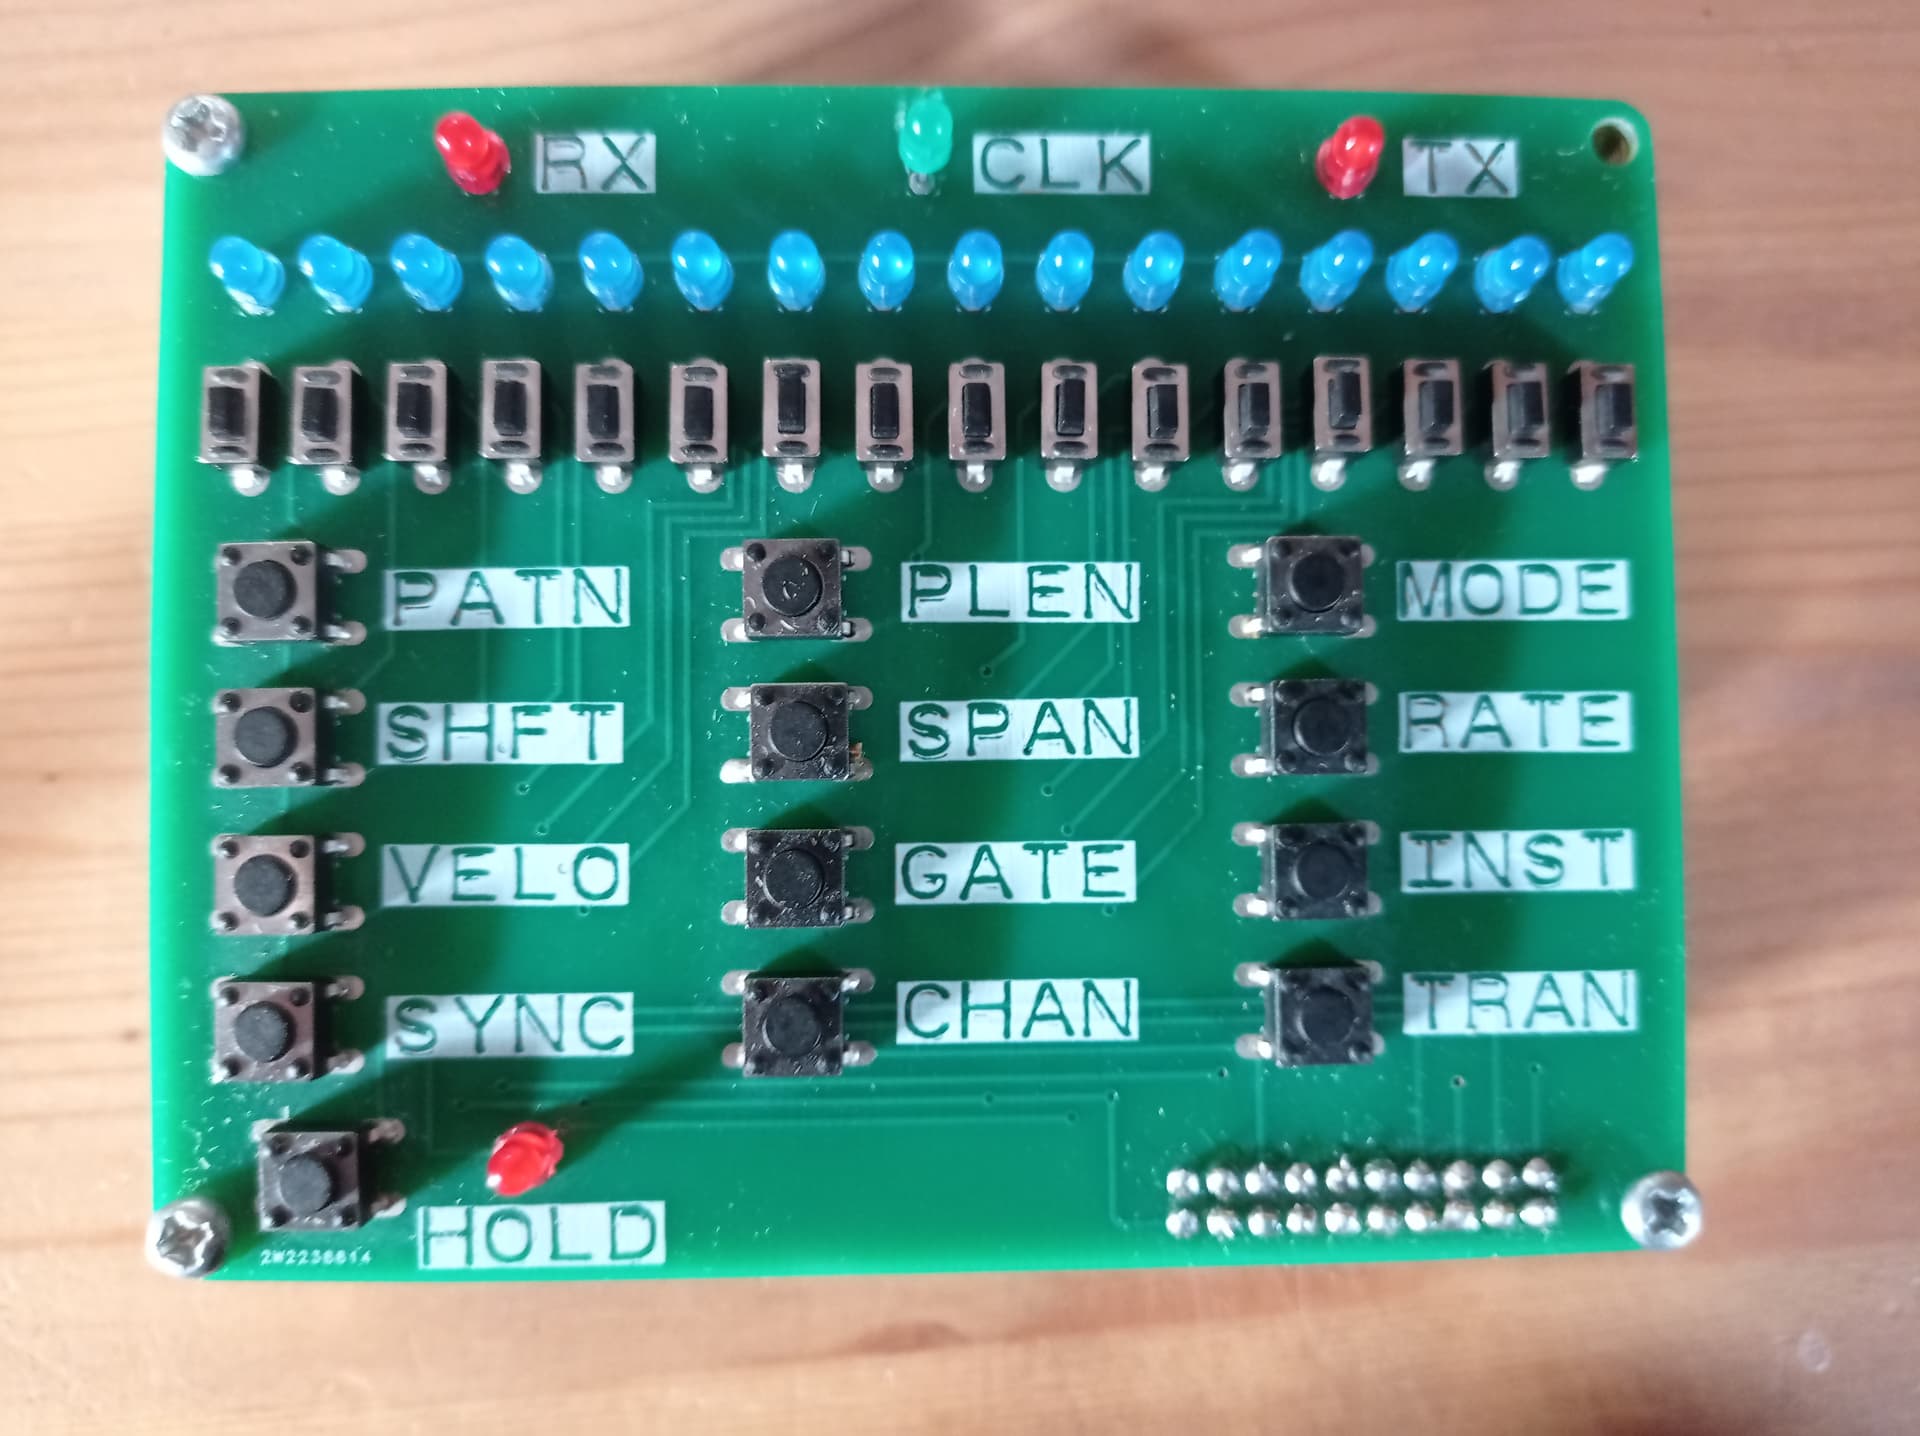
On a more cheerful note, I built an Arpie from Sixty Four Pixels - I had the boards fabbed ages ago but hadn’t got round to ordering all the parts. It worked first try and was a good refresher into drag soldering the SOIC shift registers. I’ll post recordings of both this weekend.
First impressions, it’s a really useful tool
Relatively easy, all the difficult SMD components are already mounted on the board in the kit. Sound came out from all the right places, now I just have to get my head around FM synthesis…
I just change 2 things, the jack socket of the INPUT of the second, i use a switch jack socket to have the same thing on the 2 output when i don’t use the second in.
And also add a switch on the second for 2 values of capacitors (for long/short delay)
A new ADSR board with 8 channels and control board for my polyphonic synth endeavor. I wasn’t that happy with my prior 555 based one because of timing issues and voltage control of the parameters didn’t worked out that well. This one is based on the 3310 and is much more reliable. It is inspired by vintage Crumar synths. There is control of all four parameters, gate and trigger input and CV output.


")