Sorry if you already mentioned it, but did you try switching out the optocoupler?
2 Likes
I didn’t mention it, but I did try switching the octocoupler from two vendors so far. I do have another octocoupler from a third vendor on its way.
2 Likes
You could maybe test the optocoupler and LS14 by checking if the midi-thru works… But then also the midi LED should light up when you send midi signals… 
1 Like
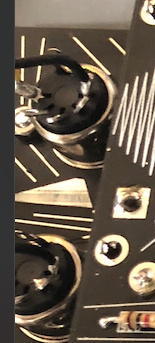
yeah tried reflowing but just consistently get a solid 1.6
is R26 definitely 220/270ohm? (220R or 270R)
also look for dodgy soldering on pins 16 of U4 and U5, also maybe even remove both of them and see if the voltage changes at all. the 10.6 is the reference voltage for both of these, if you look at the schematic you’ll see the components to focus on. them being. the trim pot, the tl431 , also the 5k1 that is on R4 and the capacitor C4.
2 Likes
holy shit
i just spent ages looking for the tl431 not remembering what it was and i didnt even put it in
2 Likes
hahahahaha!!! that’ll do it!!! all good! these things happen, I do that stuff all the time too
1 Like
hahaha yeah funny thing is i got it in and checked the voltage and i was on 10.58v
feel like im just stumbling in the right direction today
all now works fine apart from channels 5 and 6, im assuming ive just done some dodgy soldering on the part of the circuit that deals with those two
nope its fully functioning!
the Kosmo version comes default to the mode 4MV which means channel 1-4 are just normal midi to cv then 5 and 6 actually become a velocity, and the trigger out of gate 6 is a midi clock.
check the manual here for more info! http://midimuso.co.uk/index.php/cv-12/ you can change the modes by playing one of the files on that site from your computer into it to change it to another mode
this is a link to the midi files to play into the interface to change the modes http://midimuso.co.uk/wp-content/uploads/2015/08/CV_12_MDI_Program_Changes.zip
I think your expecting mode 6, which is just 6 straight up midi to cv converters channels 1 - 6
3 Likes

if you look at this table you’ll see the line PCB Port, the B1 through to D6, these are written on the front of the midimuso modules panel, so you can see what each of the jack outs will do in each mode
1 Like
ah man thats amazing thanks for linking me to it all, i really should read everything you write on your website because im sure its there too
but yeah, thats actually killer, you have it setup pretty much exactly how i would want it tbh, i wasnt gonna fuss over channels 5 and 6 becasue i would never get that far but i was wondering if i could get a midi clock out of it
again man nice work, i am loving my kosmo so much im gonna have to build a bigger case!
also im gonna take it in to my studio proper and do a twitch stream with it so will tag you and link you !
5 Likes
awesome!±!! yeah please let me know when you plan on doing the stream and what not ill deffo check it oooh!!! ill be interested to see how it sounds in others hands! proper glad your getting on with it all dude!!!
1 Like
Oh. I think I figured out the issue. Pretty sure I soldered on to the wrong midi pins. Will fix that later and I’d bet it probably would have worked right on the first try. If that’s the case, gonna have another post in litany soon.
Correct soldering:

Mine:
3 Likes
Seems about half the MIDI DIN pinouts are drawn from one side and half from the other side, and 80% don’t tell you what side you’re looking at…
4 Likes

That’ll do it 
1 Like
aaah amazing!± best its an easy mistake to make! the pinout of a midi connector is very anxiety inducing, for me. as @fredrik says you can’t really take any of the pictures on the net as truth as some are from the front some are from the back and they hardly ever label which way it is. 9 times out of 10 I do a leap of faith and just solder the 2 wires 1 way round and hope it works, there’s a 50 percent chance it does, and if the machine doesn’t work the first thing I do is swap the midi wires around ha. its something that was quite the stumbling block in the design of this modules layout, I wish there was a good cheap readily available up facing PCB mound midi connector, they are usually relatively unreliable to source, there are right angle pcbs midi connectors they are very common, but then it requires a different awkward connector aah
im glad you’ve got it working!
5 Likes
Thanks! It means I can move the BSP elsewhere for now and simplify some of the wiring. Can’t wait to work that out tonight!

4 Likes
looking good!!! I like the only yellow patch cables!!!
4 Likes