I am currently working in a arduinoboy with CV injection in the “GB oscilator thread” wouldn’t that bei pretty Close to what you are looking for…
1 Like
Hello everyone,
my new converter toy reached the next level. “Program 1” is implemented. This makes the device being a stand-alone MIDI sequencer.
CLK1 serves as master clock. CV1 to CV8 are iterated. Unconnected CVs are interpreted as 0V / C0 note.
Here the new fun video: https://www.youtube.com/watch?v=OrOuQNHJ9Yw

5 Likes

FYI for the miniDexed crowd there is also this JV880 emulator GitHub - giulioz/mini-jv880
1 Like
Fresh from the playground: 2 more sequencer modes as “Program 2” and “Program 3” implemented: “Moving Backwards” and “Knight Rider Mode” ![]()
See YouTube Video:  !
!
2 Likes

11 Likes
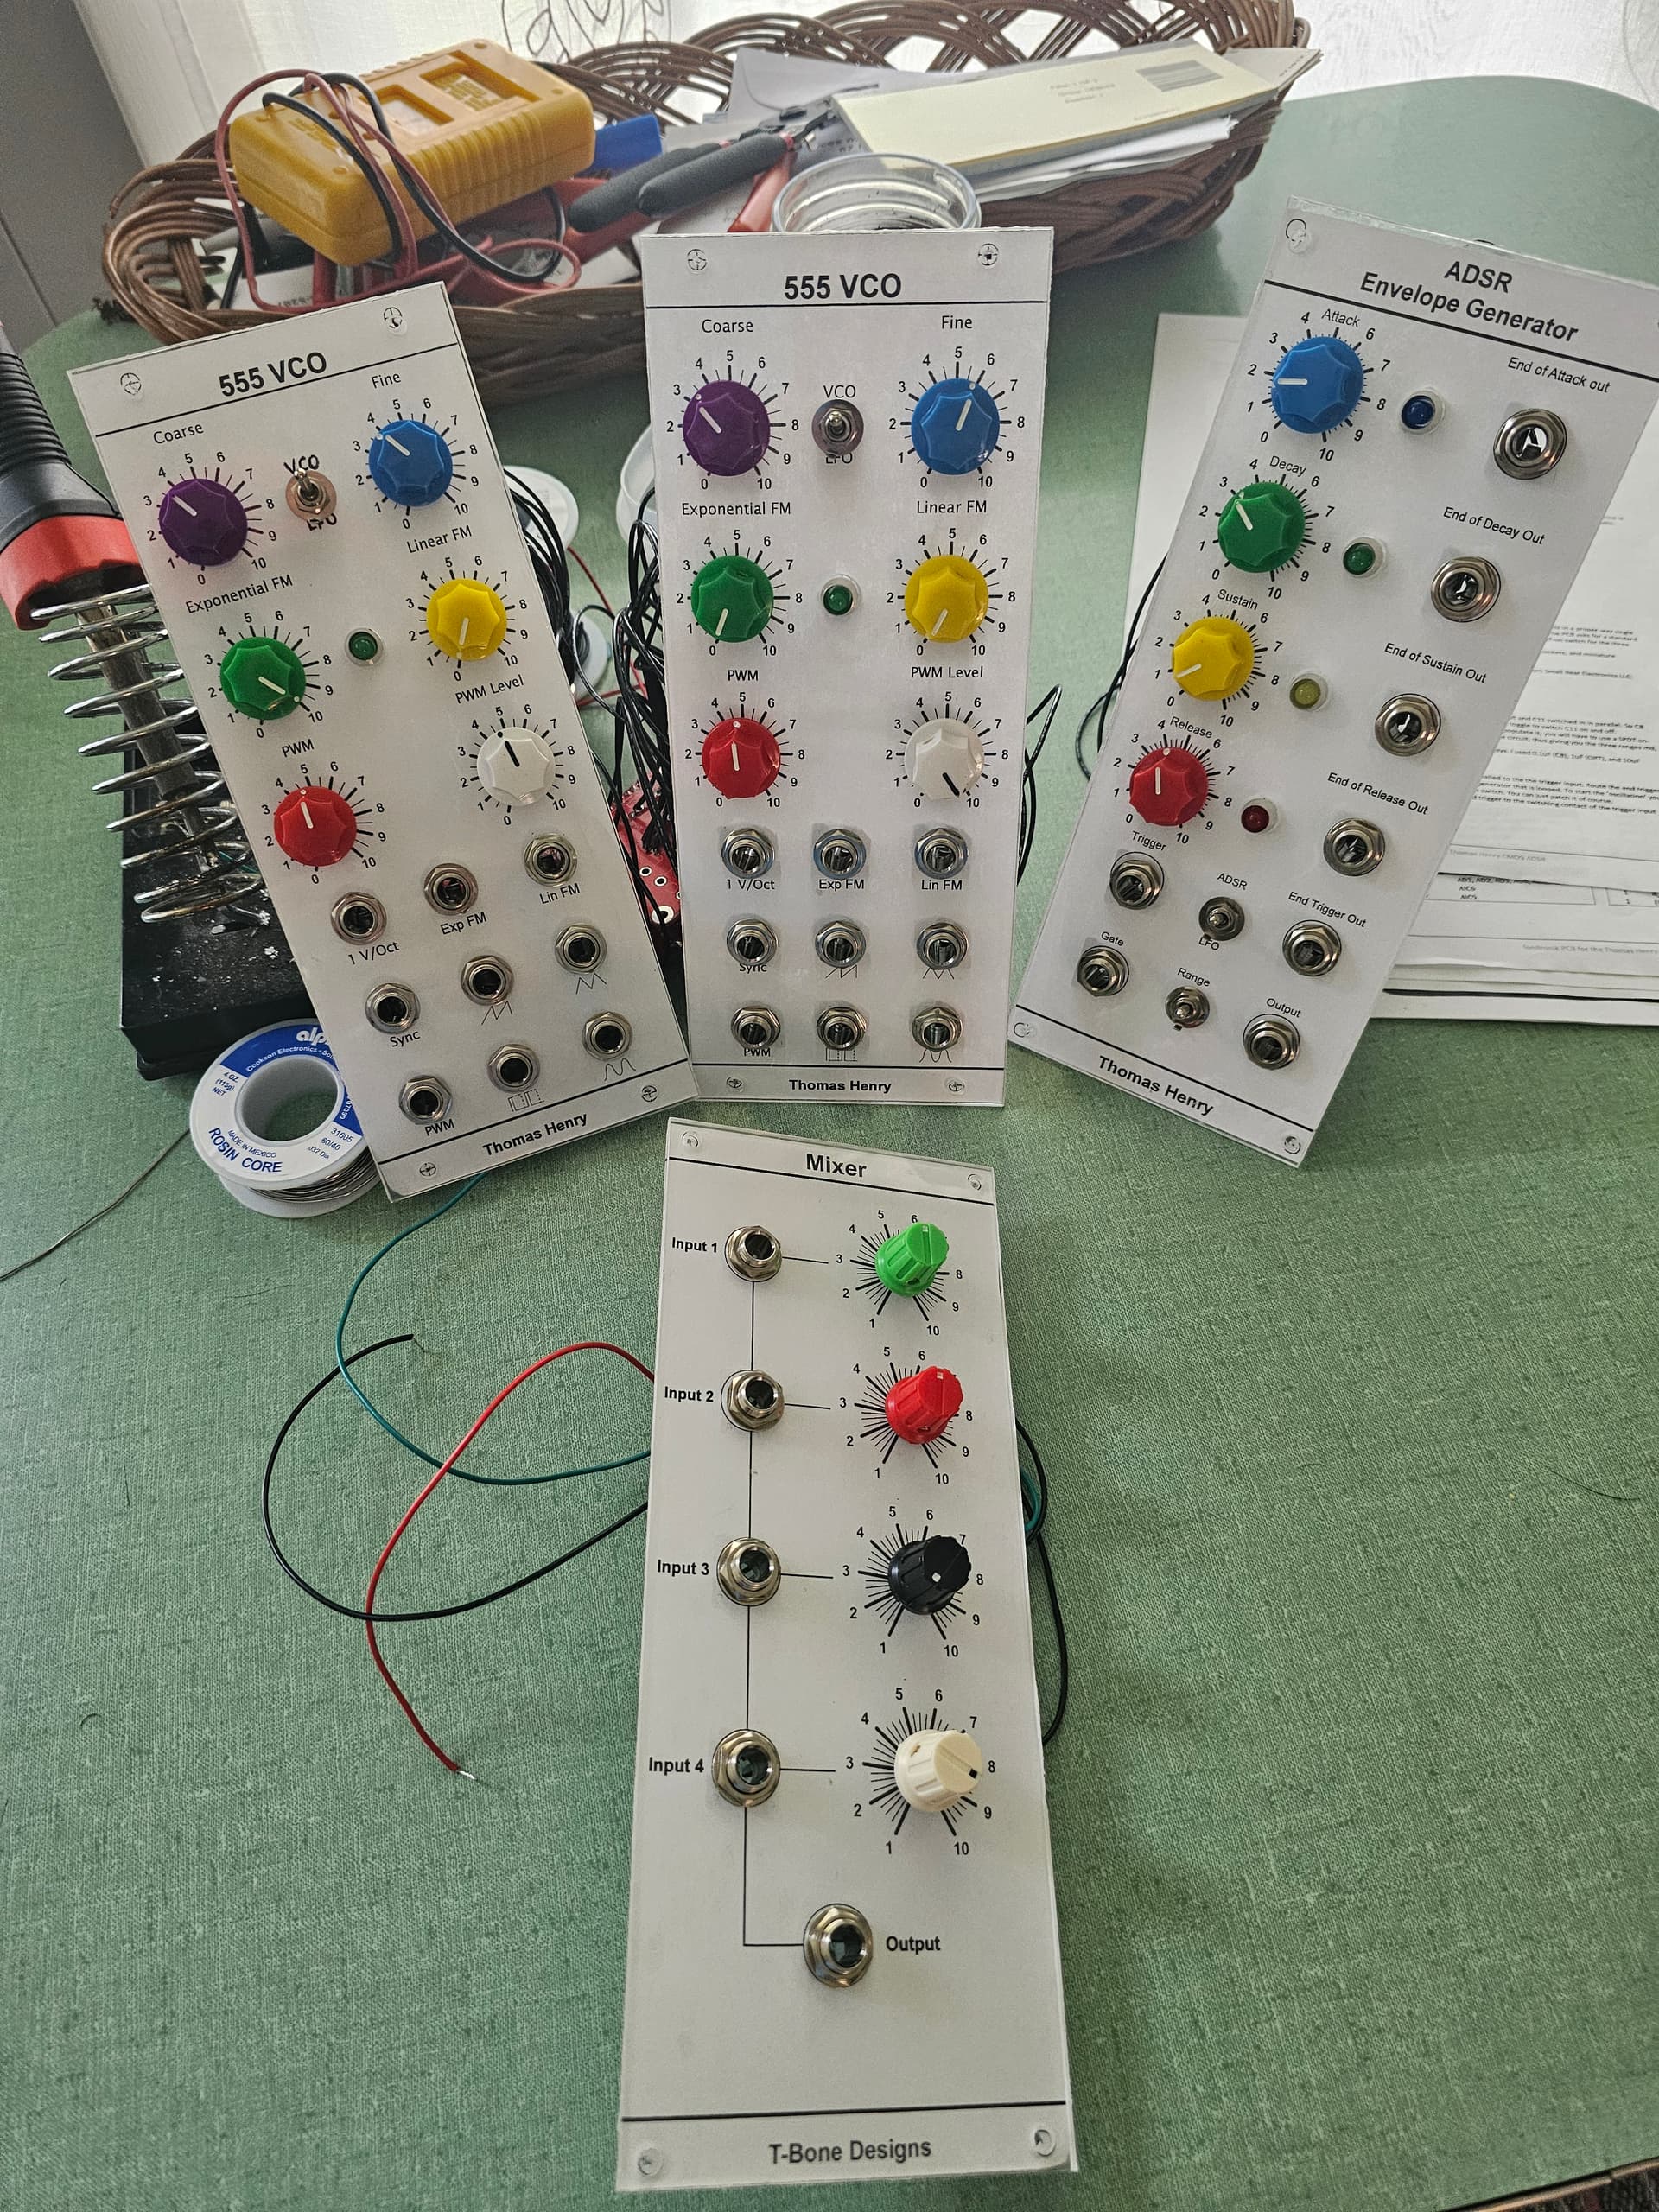
Still need to calibrate the VCOs and do some minor troubleshooting, but they make the buzzy sounds like they should. The envelope generator is super fun with the light show. I have two more of those to finish building.
13 Likes
Building a version of the SYNTHI… XR2206 oscillators on one side, adding a Wavetable oscillator on the other side (because tunable). Sort of cramming a lot into a box for Matrix control.
Found a very nice picnic suitcase in a flea market, found an old ex-military electronics matrix connector on ebay, some vernier dials, a joystick from a radio control, and tried to fit all of that into a box that could be taken out of the suitcase (not just have it in the suitcase and de-hinging the lid).
Sort of done with the front panel (2mm aluminum, a good friend helped me cut it, after I designed it forever, trying to squeeze everything in, doing blueprints in Adobe Illustrator, testing with knobs on printouts again and again). Panel print is a A3 laserprint that was laminated and cut. Sticks on with double sided tape and all the nuts. On 2 mm aluminum.
Mechanically arranging it like the Nagra III, opening via hinges on two frames (not just lifting the front panel). Fitted the spring reverb tank and the speaker (played around with a EMS VCS3 when I repaired one for a friend, and the speaker-spring-reverb-feedback was amazing, I want to be able to do that…).
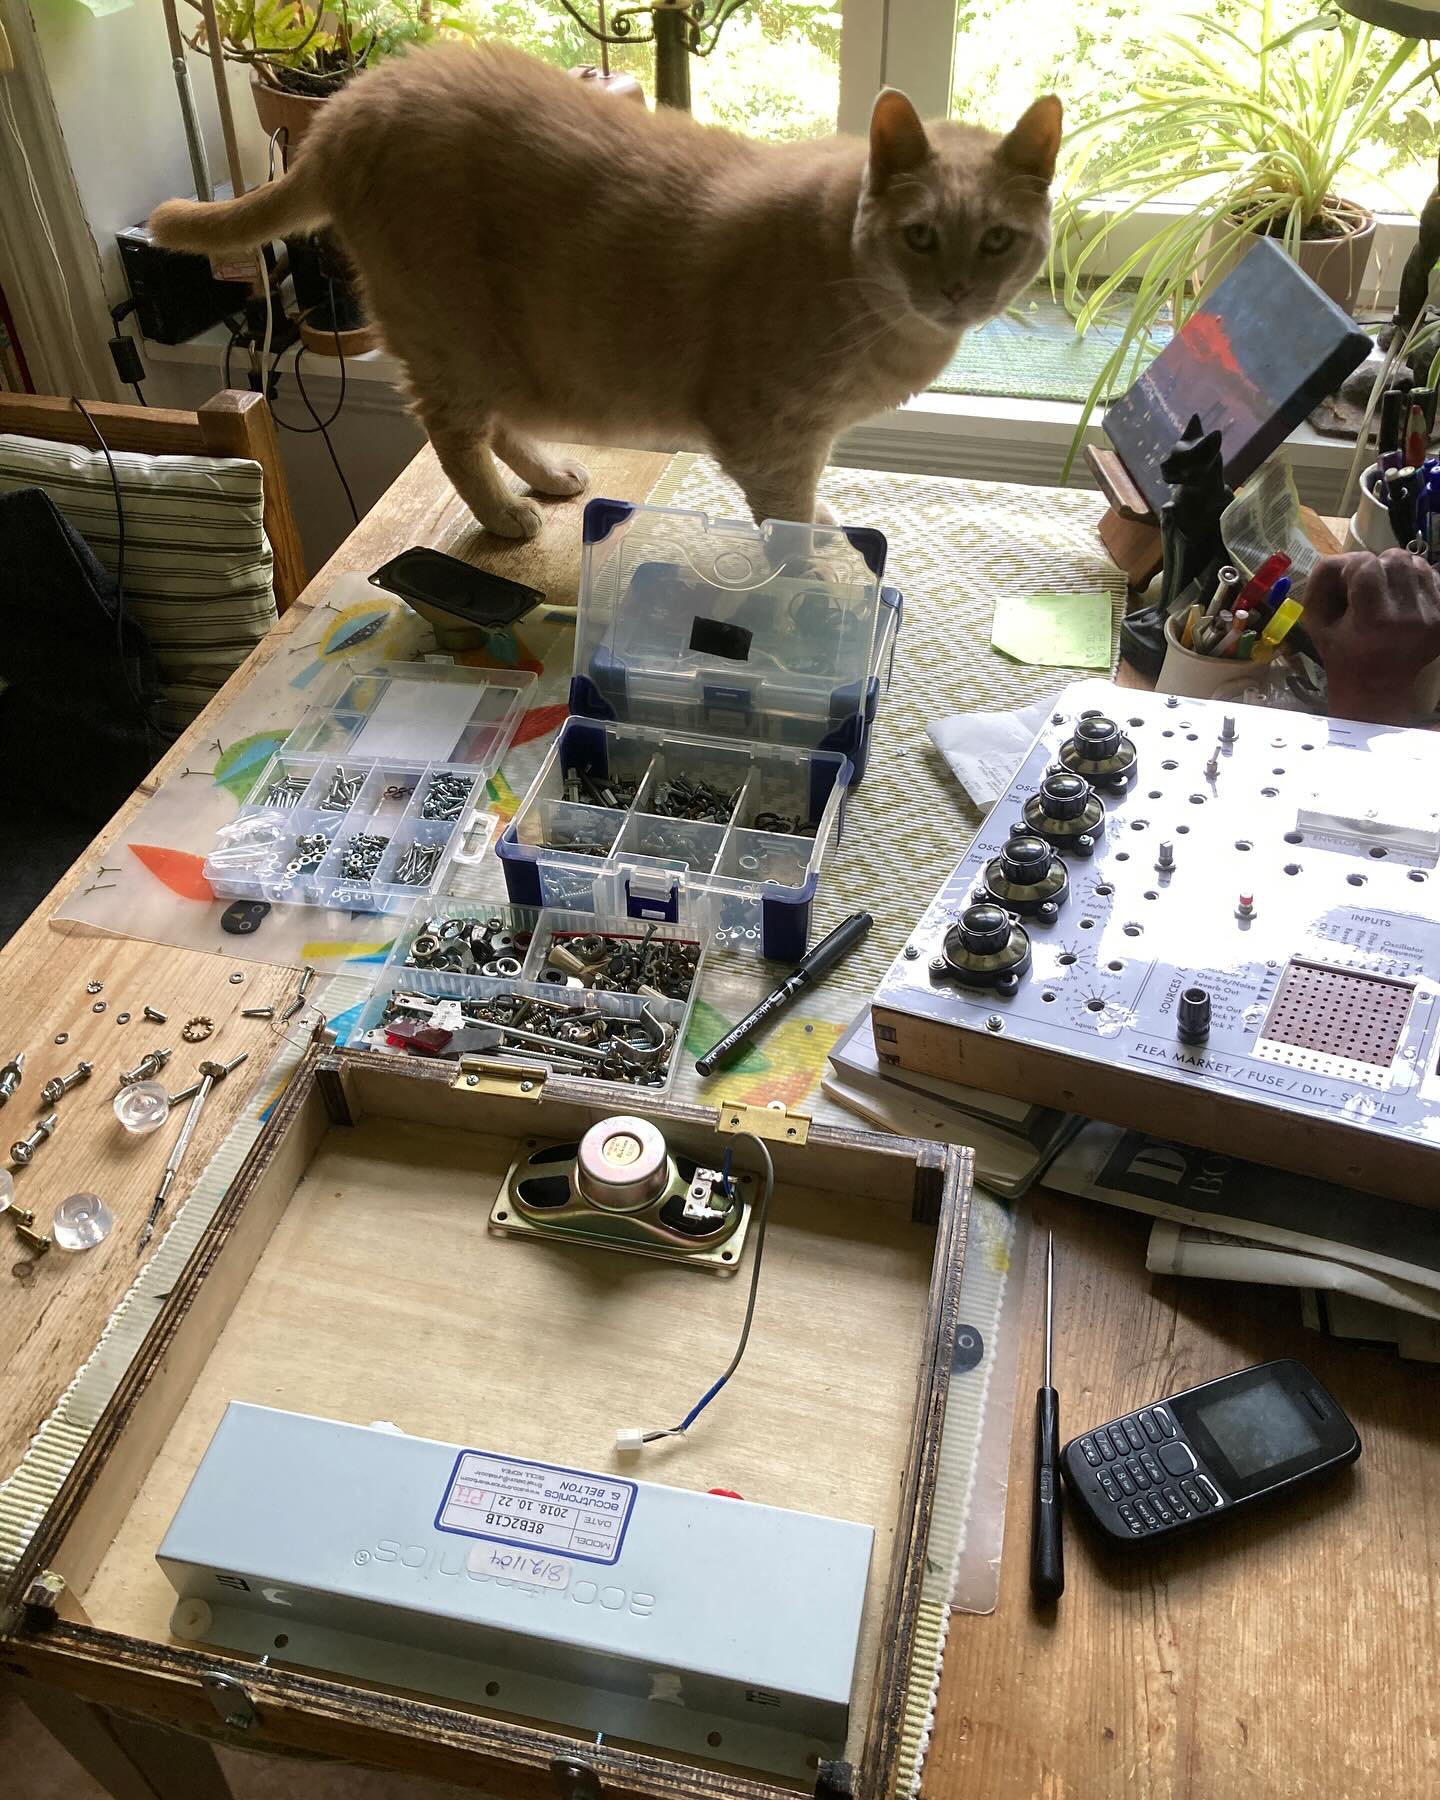
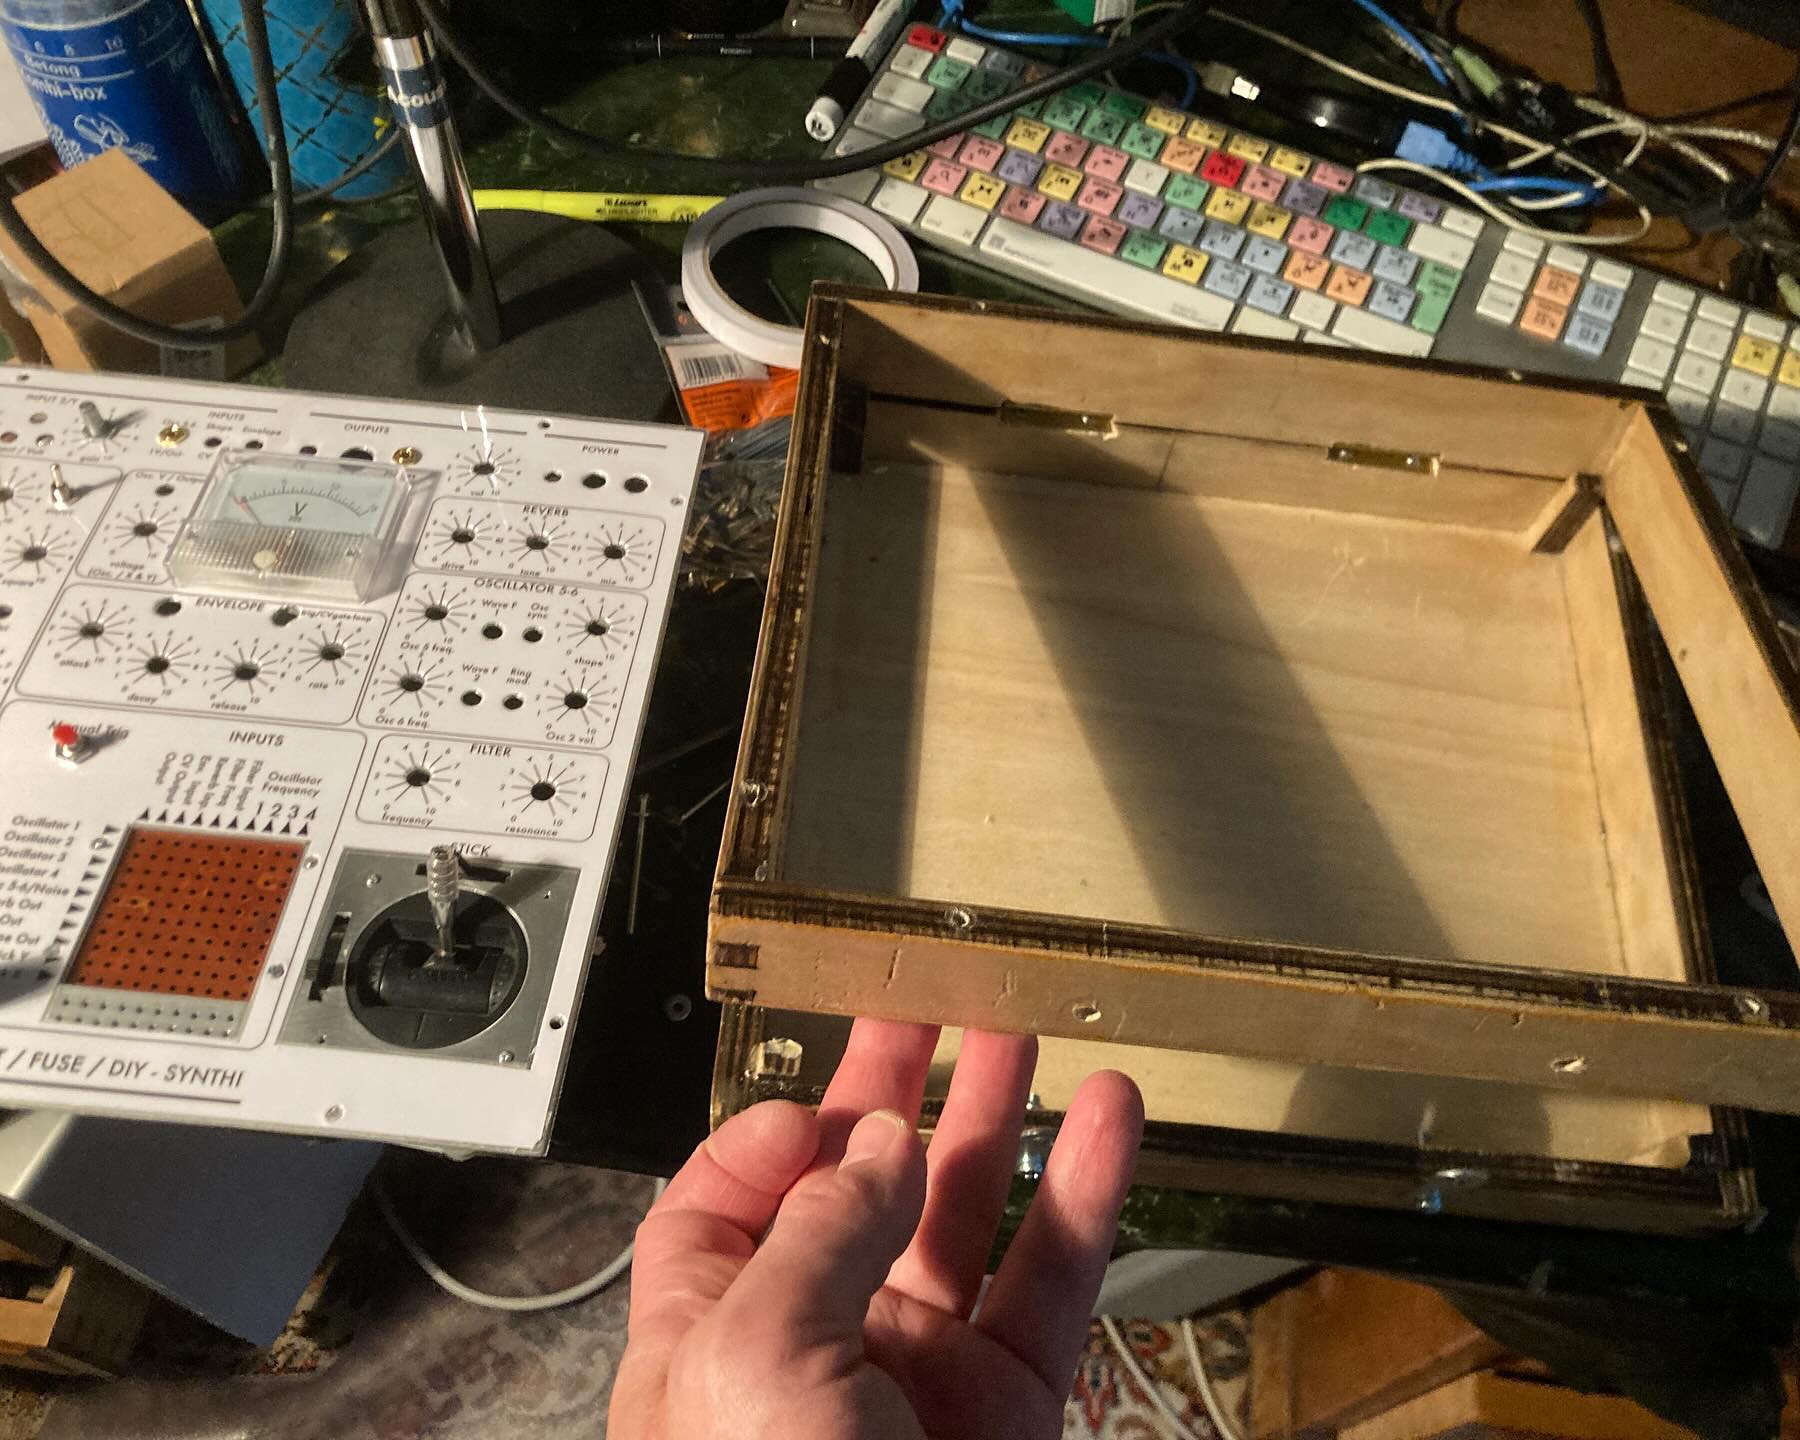

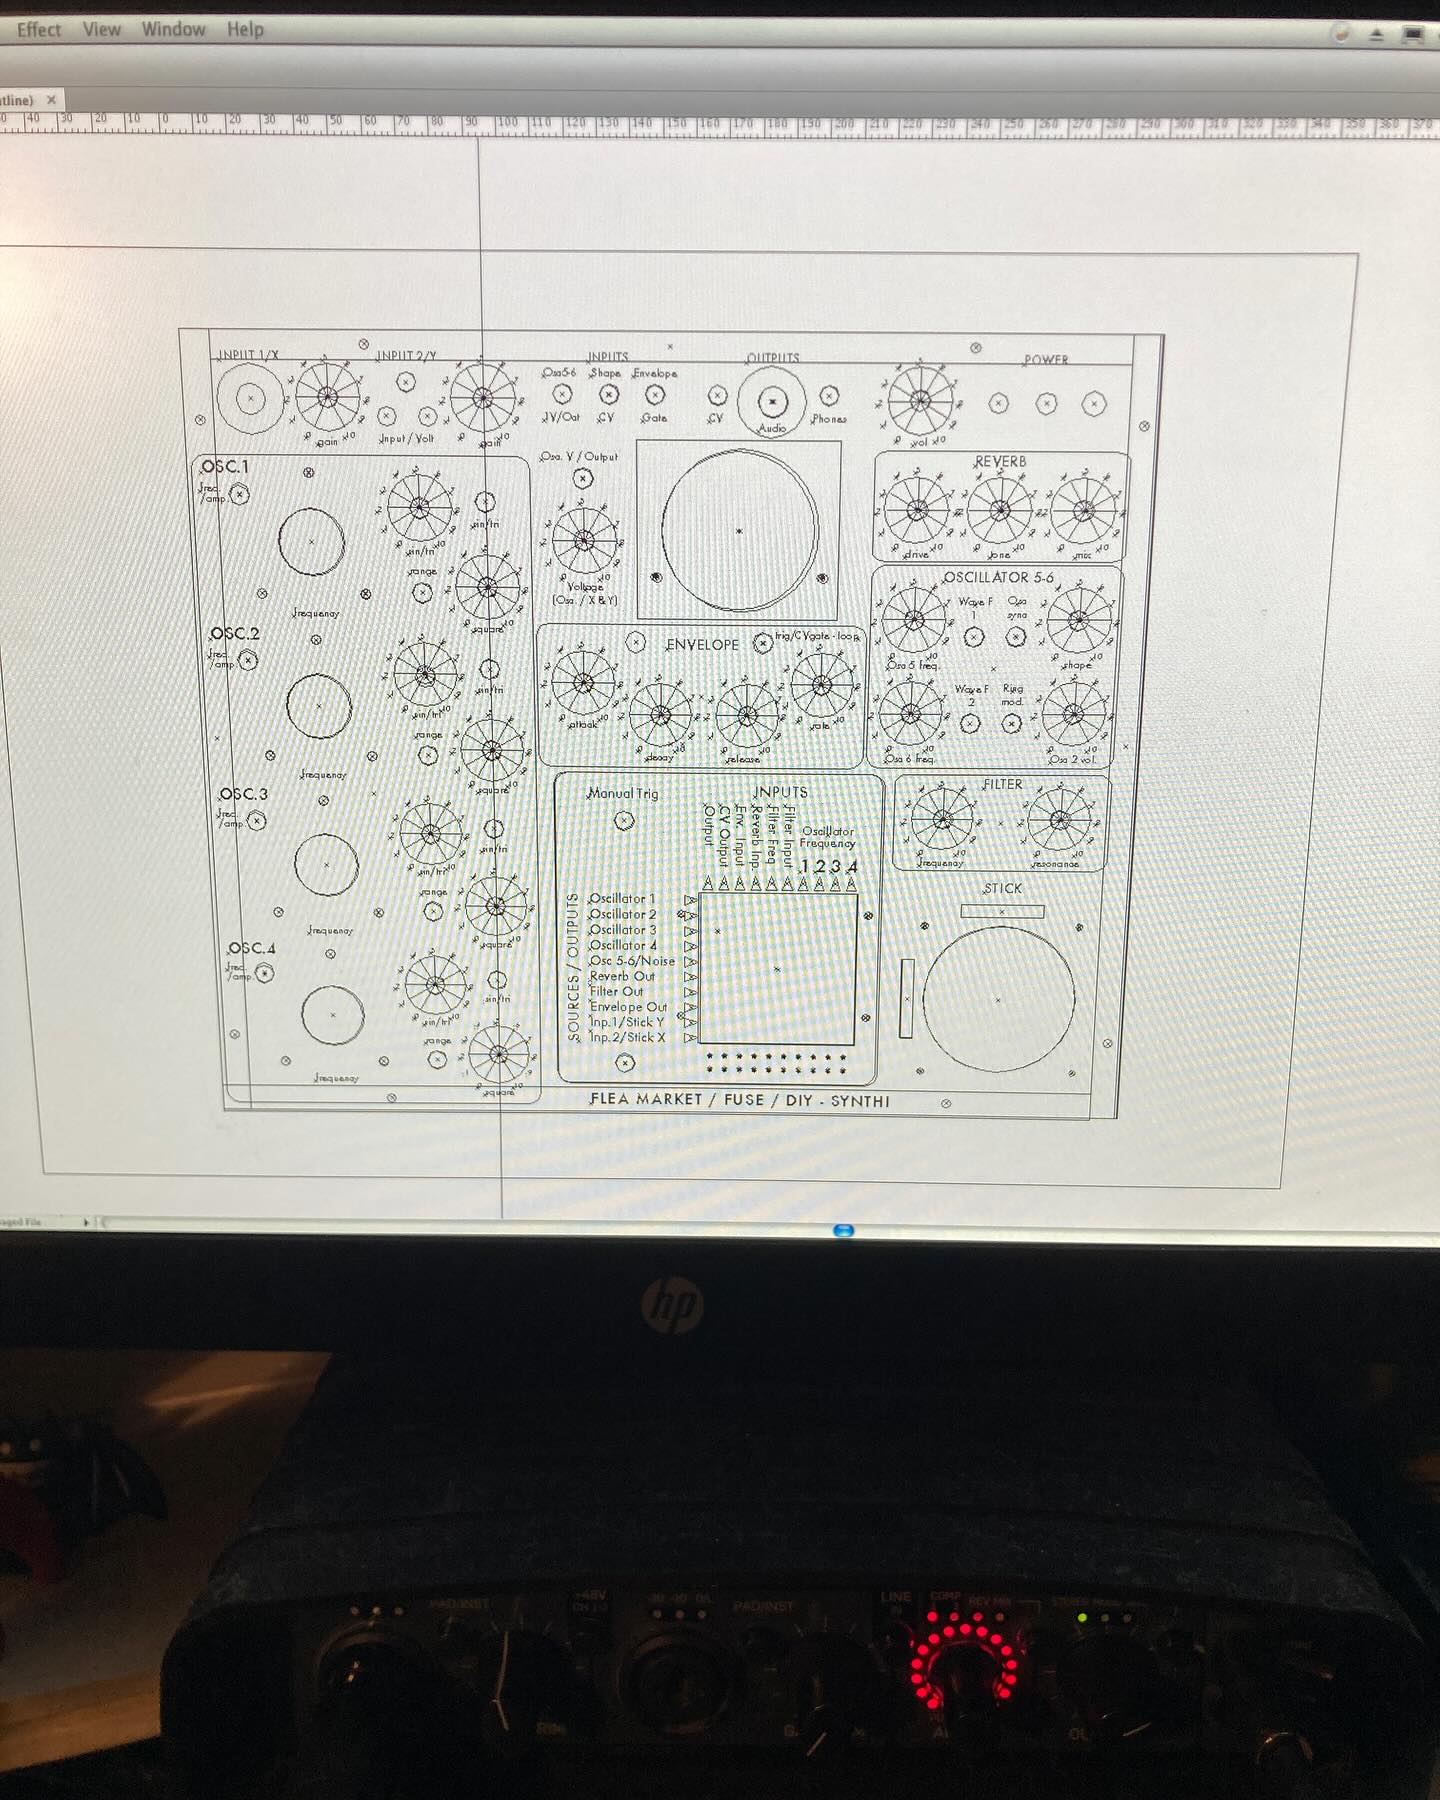
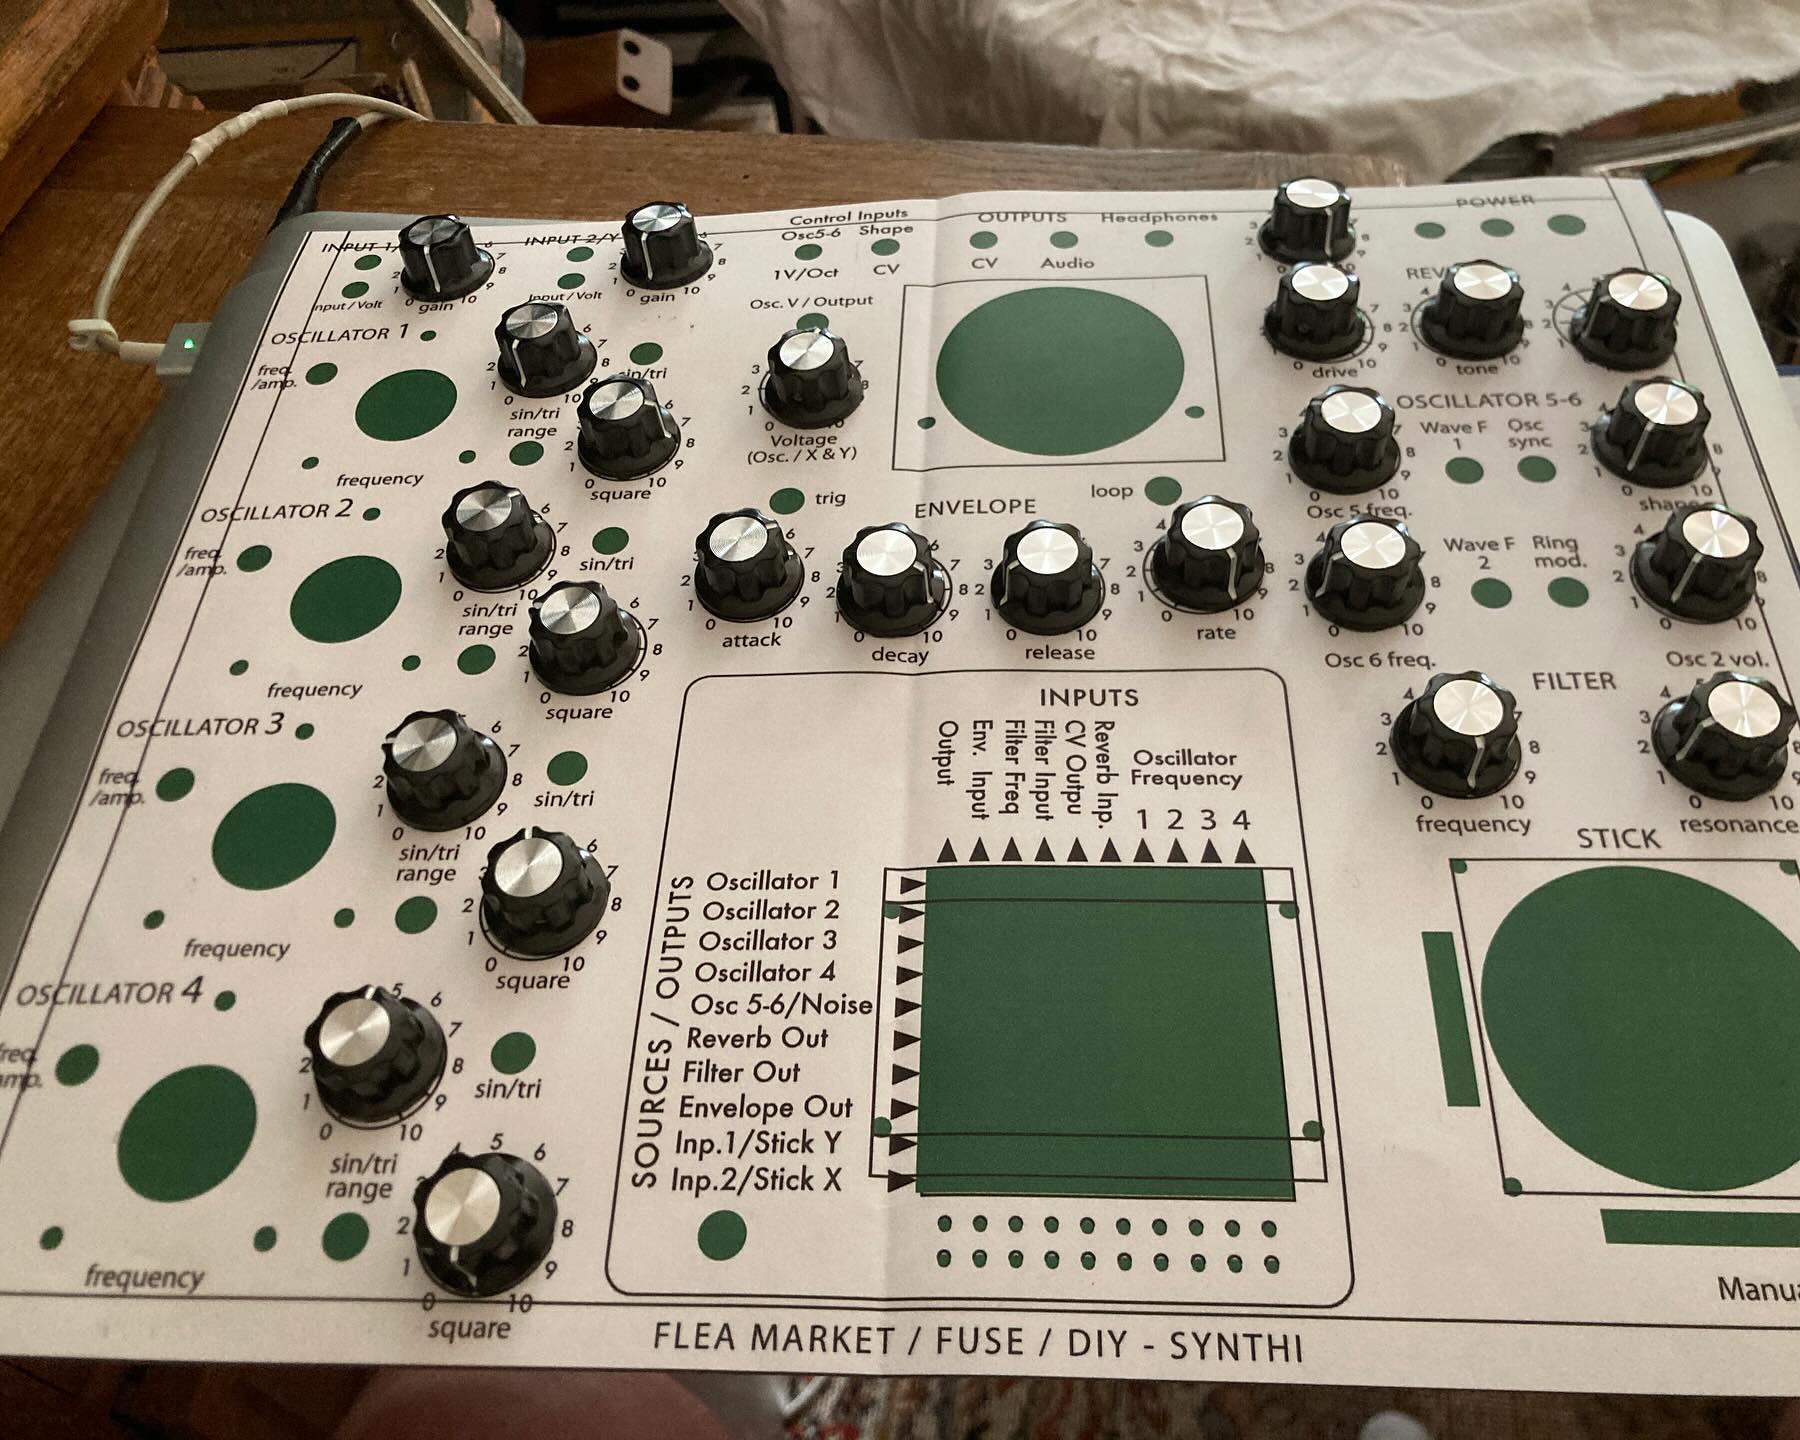

EDIT - it all started with this proof-of-concept experiment some 4-5 years ago

17 Likes
nice and thats how it begins , the rack will fill up quicker than you think haha .
3 Likes
ODDSOCKS
Here’s a machine to play wrong notes: two separate sequences of triggers and control voltages, randomly-generated but rhythmically and harmonically related to each other.
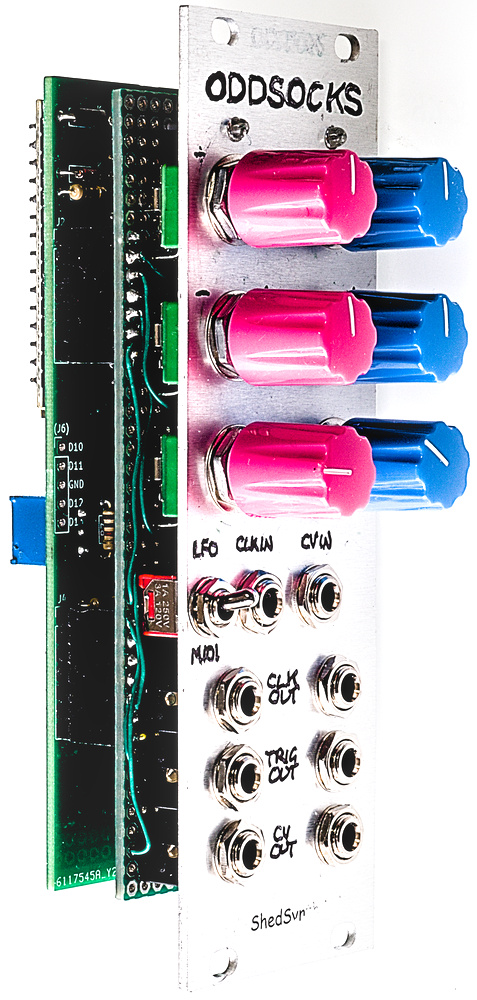
- Self-contained LFO/clock trigger source.
- Clock divider/multiplier for another module, or external device such as a drum machine.
- Random trigger source.
- Random voltage source.
Details at shedsynth.wordpress.com/oddsocks-a
6 Likes
this is interesting. i’m a bit confused by this bit though:
– Clockwise (right): sequence becomes more random, or
– Anticlockwise (left): sequence becomes less random.
If center detent is no change, then how do you get less random than that?
Thanks @krztoff.
As you turn the RANDOMNESS knob anticlockwise from the centre, notes are assigned from a reduced selection, initially pentatonic then fewer and fewer as you keep turning, leaving only the root at the end of travel.
Also when turning anticlockwise, notes are assigned in a fixed pattern according to the index within the sequence.
There is still a bit of randomness: for any setting of the RANDOMNESS knob, clockwise or anticlockwise, the CV INPUT controls how likely a note will be changed at each step.
A preset trimmer sets a default CV when nothing connected, and currently I’ve got mine dialed to about 20%.
I think there is room here for some more experimenting, so I’m hoping that other people might modify my code to make their own ODDSOCKSes with completely different behaviours and sounds.
1 Like
The unfortunate downside of the DIY banana jack system is that an earlier, perhaps more cavalier attitude to issues such grounding, resistance and a wilful ignorance basic electrical standards will (and indeed has) come back to mire all future recording attempts in the fiendish spectre of ground hum.
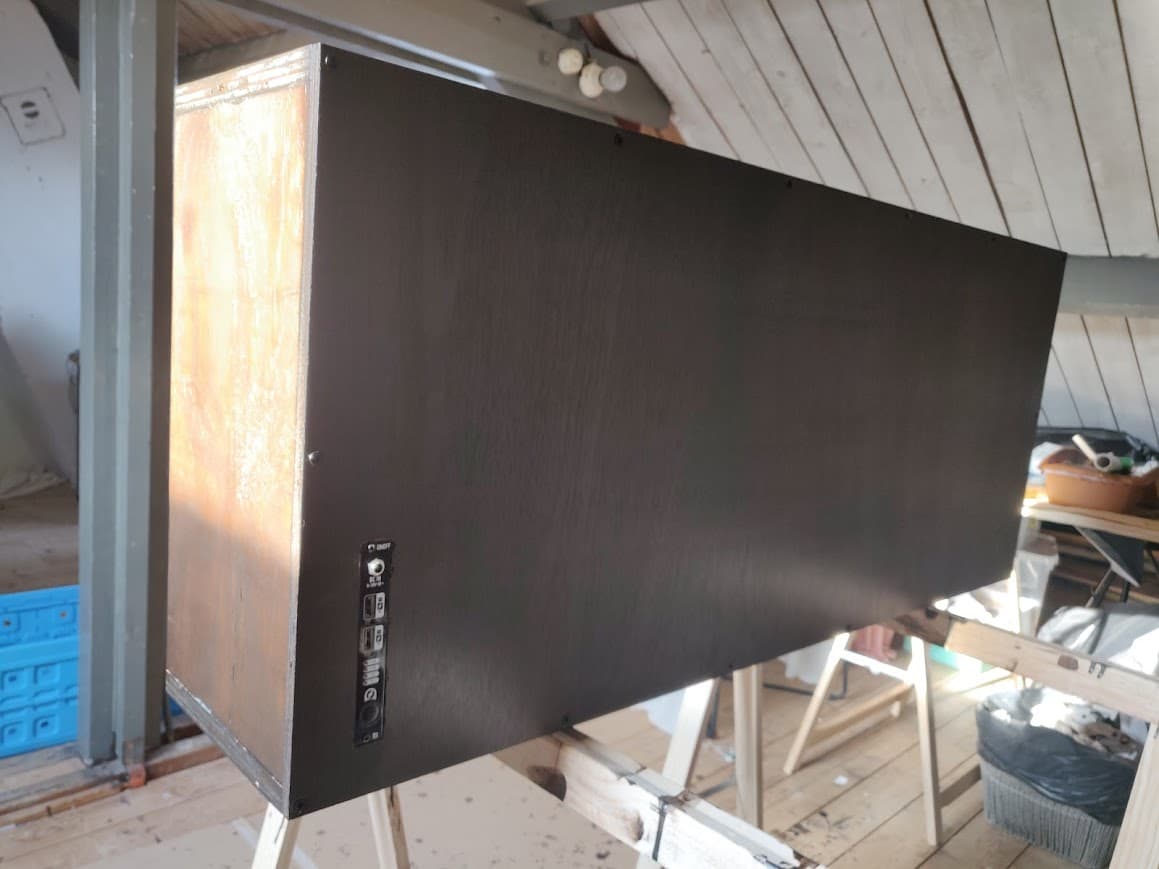
Not to say it was that bad; jamming on it was fine but recording has unfortunately made it much more evident, enough to spur me on to finally fix it up. Definitely gone overkill on the grounding though (soldered copper tape for the front panels, bus bar for the ground) but it’s nice to know It won’t be a problem again. Finished one case so far and the result is lovely and whisper quiet:

And I’ve also recently upgraded my old dodgy wav trigger module to new (I would say sleeker) Tsunami wav trigger, although the annoying 3.3v trigger limit has made wiring it an absolute beast (transistors on every input). But very nice to have multi outputs. I’ll hopefully recycle the original wav trigger into some sort of midi only polyphonic thing or something but that’s a job for another day:

10 Likes
This looks amazing!
What are you connecting the earth to outside the case? I see the cable out next to the AC in.
I like the SD slot on the player. Is that commercial or did you make it?
I look forward to seeing the populated cases.
1 Like
The earth just goes to a big terminal post so I can easily share the common ground between the cases with some lugged bits of 4mm to try keep the resistance as low as possible. The SD card thing is a 3D print clip for SD card extender (which I never knew was a thing until recently) which is basically a cable that plugs into the sd slot and extends it on a dongle (which you can then clip into the 3d print thing).
2 Likes
Cool, so is the SD clip your own design?

maybe you followed my progress in gameboy oscillator documentation thread. I am now the proud owner of a GB triple oscillator
you can build your own too, i released the gerbers and whiped up a documentation ![]()
15 Likes
love the art work ! very unique , nice clean build on the case to. ah yes ground hummmmmmmmmmmmmmmmmmm …
3 Likes
This is Iosefka (Yes, it is a Bloodborne reference ![]() ). Doing some of the big pieces of firmware that needs updating before making a few of these for my friends
). Doing some of the big pieces of firmware that needs updating before making a few of these for my friends ![]()

13 Likes
Ahh, isn’t it nice we’re all friends here @hitachii ![]()
Slick build.