You should have seen US nuclear/particle physics 35 or so years ago, we’d have planar detectors designed by physicists and installed by engineers, so measurements would be metric in two dimensions and Imperial in the third.
5 Likes
This is like one of my favorite facts about typical cars sold in North America. Most cars use seat belt bolts that have 7/16-20 threads but with a metric sized head so they can use the same wrenches on everything. I am not entirely sure why they do it, the FMVSS says you can use an equivalent metric thread.
2 Likes
It looks to me like a pedal patchbay.
2 Likes
The thing with the A and B rows is the patch bay. I plug my synths, pedals and mixer into it,and instead of moving cables around on the individual things I can just use patch cables to reroute things.
The bus boards I’m referring to will be for power distribution from a supply to the modules and I haven’t put that in place yet.
For the racking I used these: Adam Hall 61535B4 Rack Strip 4U blk – Thomann UK
They are vertical.
The patch bay takes up 1U, and I put rack ears on some 19" eurorack rails for the remaining 3U. I picked the rails/ears up from Schneidersladen.
I’ll try and take some better pics tomorrow.
Cheers
3 Likes
Here are a few more pics with a little bit of explanation:

Edit: I have to go back to work tomorrow, but here’s what I managed today:

This one’s going to take a while…
8 Likes
I got all my Eurorack modules back into their own rack. Also made more IDC power cables and patch leads. In the second video I found out that I dont have enough power sockets available in the rack. Always something. Meh. Enjoy.


6 Likes
Make your power cables this way :
#=======#=====#
module power module ← this way
module module power ← NOT this way
Twice as much modules per PSU (If it can handle the amps !)
2 Likes
My unbuild progress:

Today is 2/22, a date celebrated in Kosmostan with the ritual unsoldering of pots from the past year’s unsuccessful PCB prototypes.
13 Likes
Orson Welles voice “Ahhhhh the desoldering”
i have a pump, an electric pump (soldering iron pump hybrid), desoldering pins (hollow tube thingamajig), desoldering wick, all the cheap methods.
I swear the only things that have ever remotely worked are the pumps. The non-electric one is a sometimes thing. The electric one was a god send but the tip disintegrated after about a dozen uses.
2 Likes
I bought a hot air station intending to learn SMD soldering with it, which I continue not to do, but it’s been very useful for desoldering pots and the occasional mis-placed socket or header.
4 Likes


Making good progress now! 2x modules, 2x PSUs, and the case done. I need to drill out the knobs as the ones I have are 6mm, and the pots are 6.35mm. Bah.
10 Likes
Happy that’s work ! what’s next ?
2 Likes
Thank you!
I had to use a reamer tool to widen the knob insides, which was fairly easy, so now I have actual knobs on the filter…

which is pretty exciting. I wish I could find BIG yellow knobs. Alas…
Next up I need to probably:
- Solder in the valve.
- Take the modules off and paint the rails (I should have done that before I put the PSU etc in, ah well.
Then I have a bunch of modules that are in various states of completion.
1x BOUNCE BOUNCE (90% done)
1x FILTER GRR (85% done)
Those are the main focus… then I have:
1x TWIN T Drum (Resistors soldered. Waiting on other parts)
1x Triple Splashback Delay (Resistors soldered. Waiting on other parts)
1x Safety Valve (not started. I want a doubler for a ‘stereo’ setup)
1x BUFFERED MULT (not started)
1x C64 CYNTHCART Controller (about 20% done)
D:
5 Likes
27 mm ones exist
but

ouch
5 Likes
Cripes look at the cost of them. D: At least I know they exist now…
2 Likes
Been a while since I posted a case update.
Been organising modules and adding some headers for power.
Feeling a bit better about the set up now, want to make some drums and a buffered mult next.
Still got to sort out powering the psu’s

Also been organising my parts bins with lables n stuff… so its all getting fancy now haha!
12 Likes
the case paint is the best ![]() , mine just plain black
, mine just plain black ![]()
3 Likes
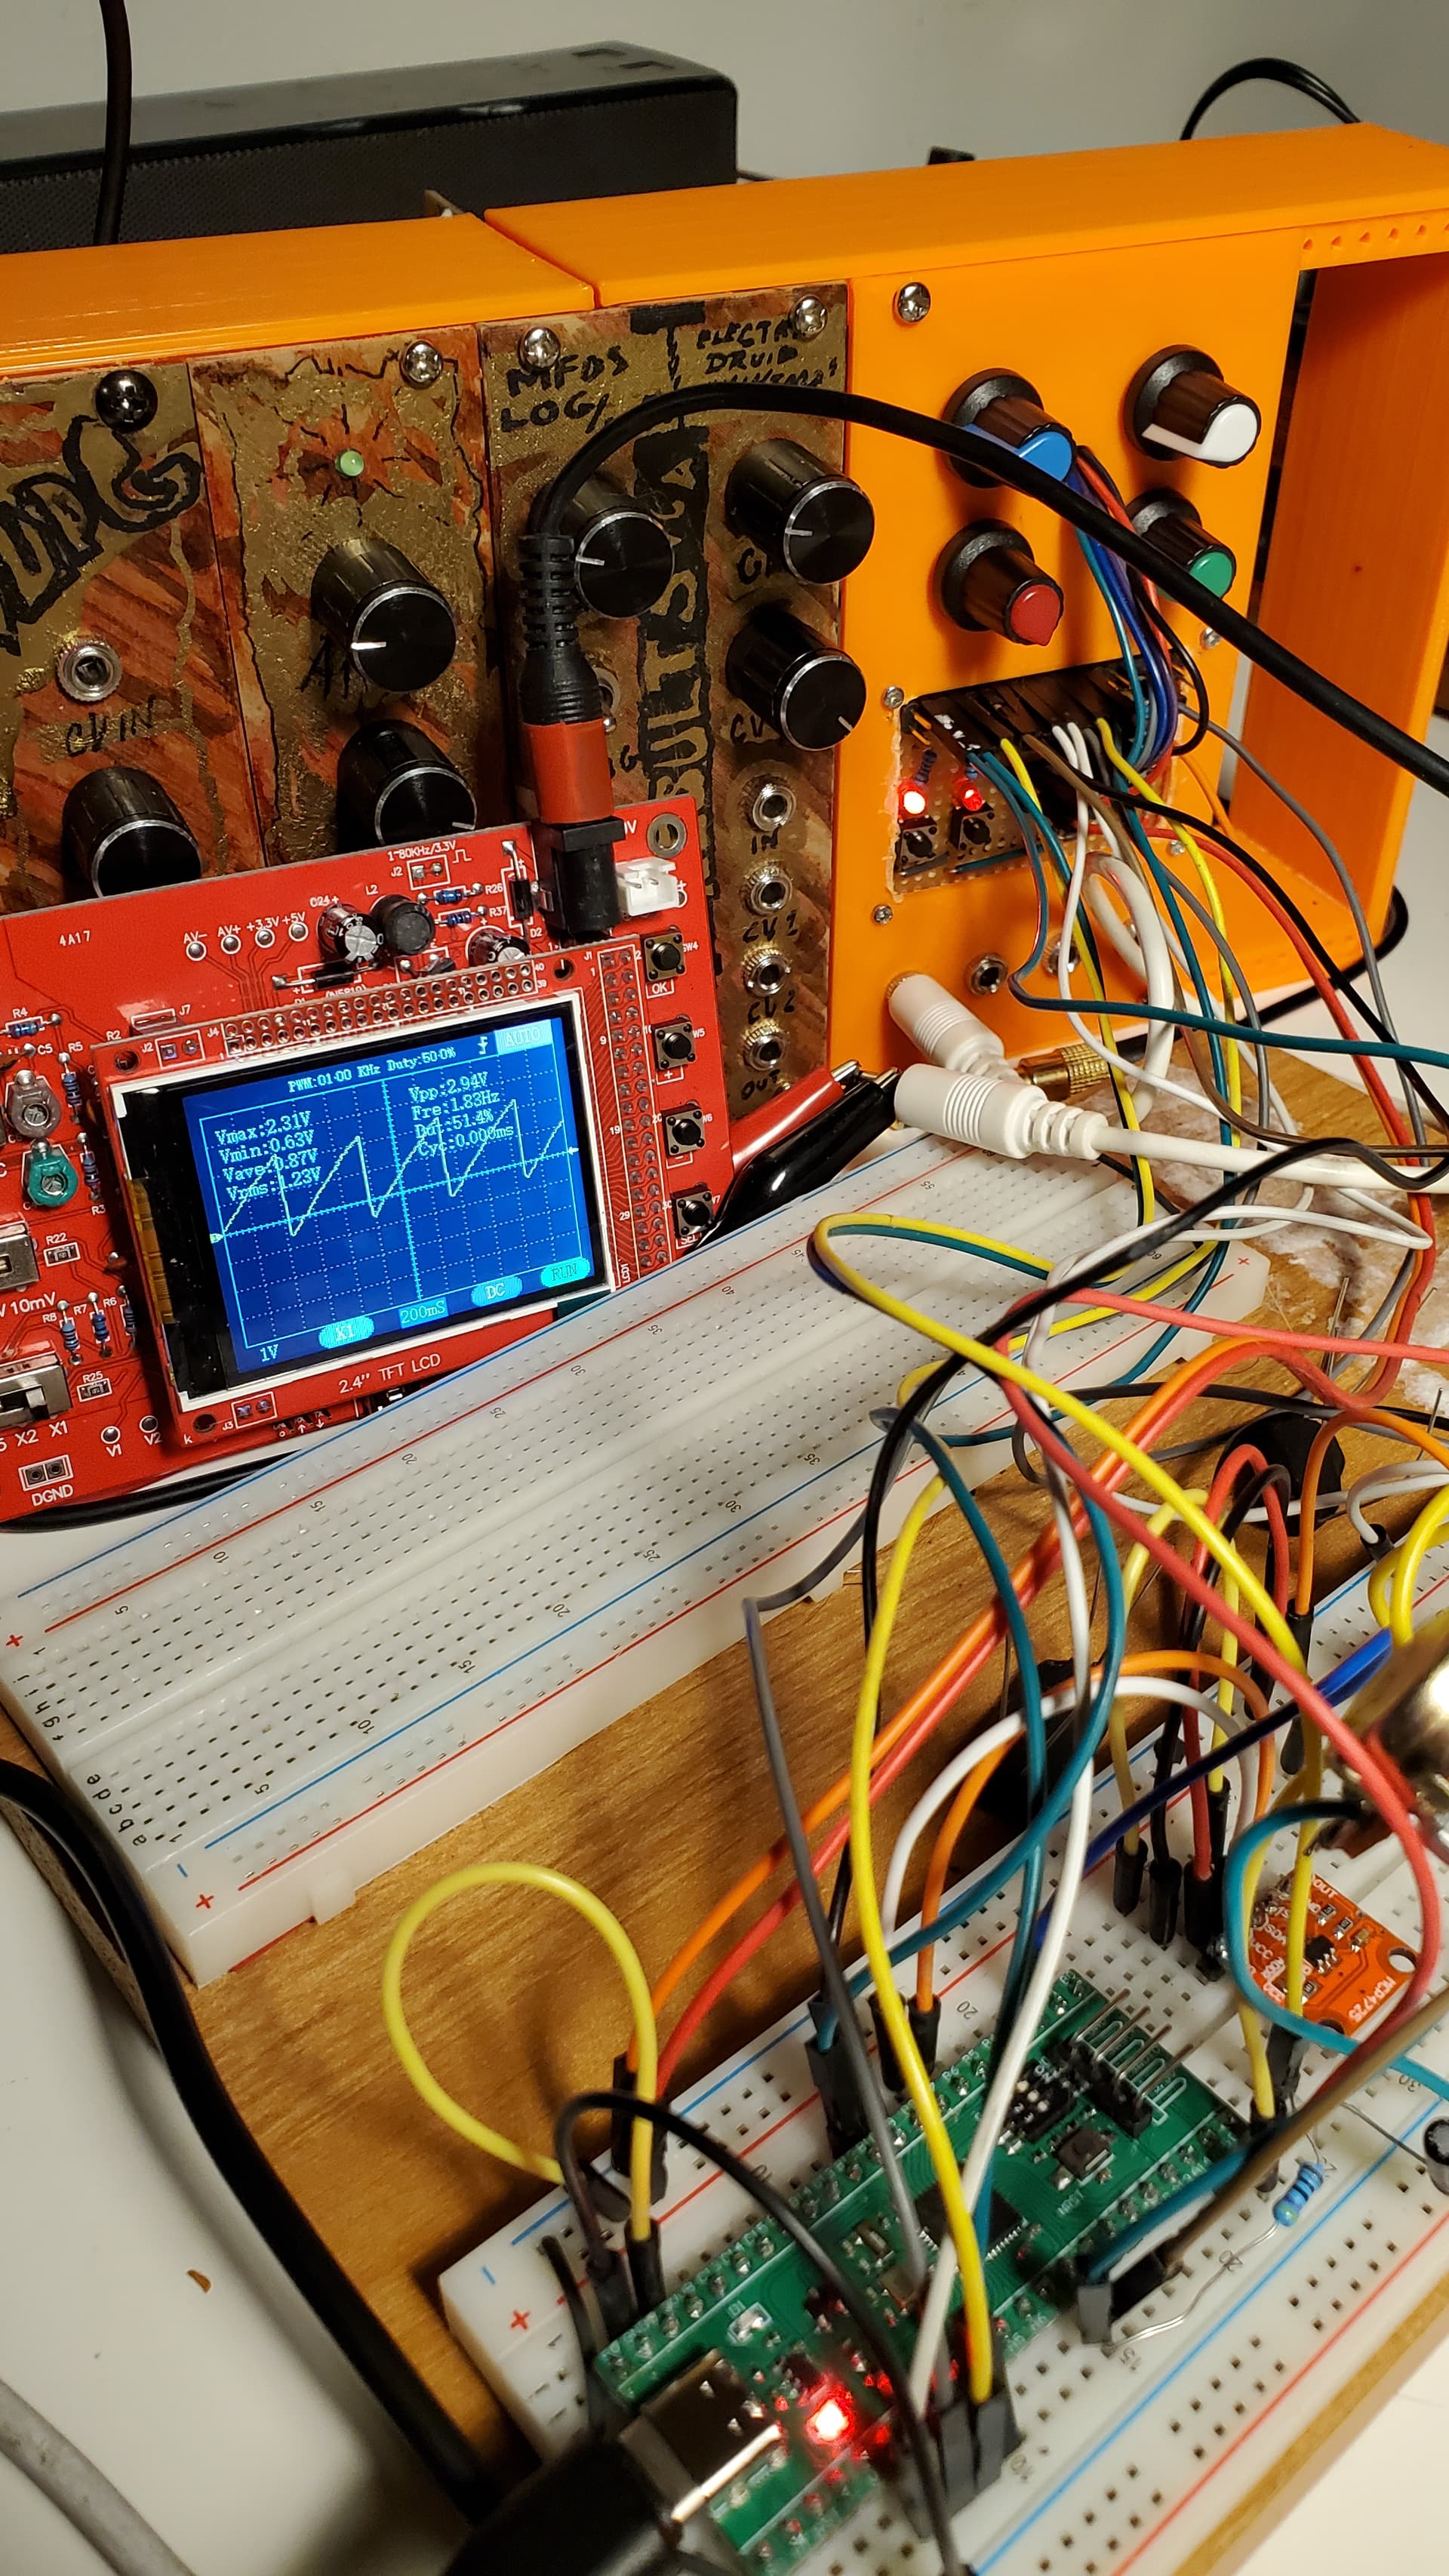
the little testing platform where i’ve crystallized my madness over the past few weeks.
note the big hole with the wires pouring out. this was my solution to not knowing how to solder things into the copper side of the stripboard.
10 Likes
Car spray paint and clear lacquer and you have any colour knob you like
8 Likes