Oldish RadioShack mixer my buddy gave me. It’s in pretty rough shape, broken switches, crusted faders, beat up paint, jacks just fall out of the sockets, etc.
My Ensoniq ESQ-1 had a broken plug stuck in one of the sockets and, after taking it apart, I was struck by the beautiful vintage board. Also, nice chips!
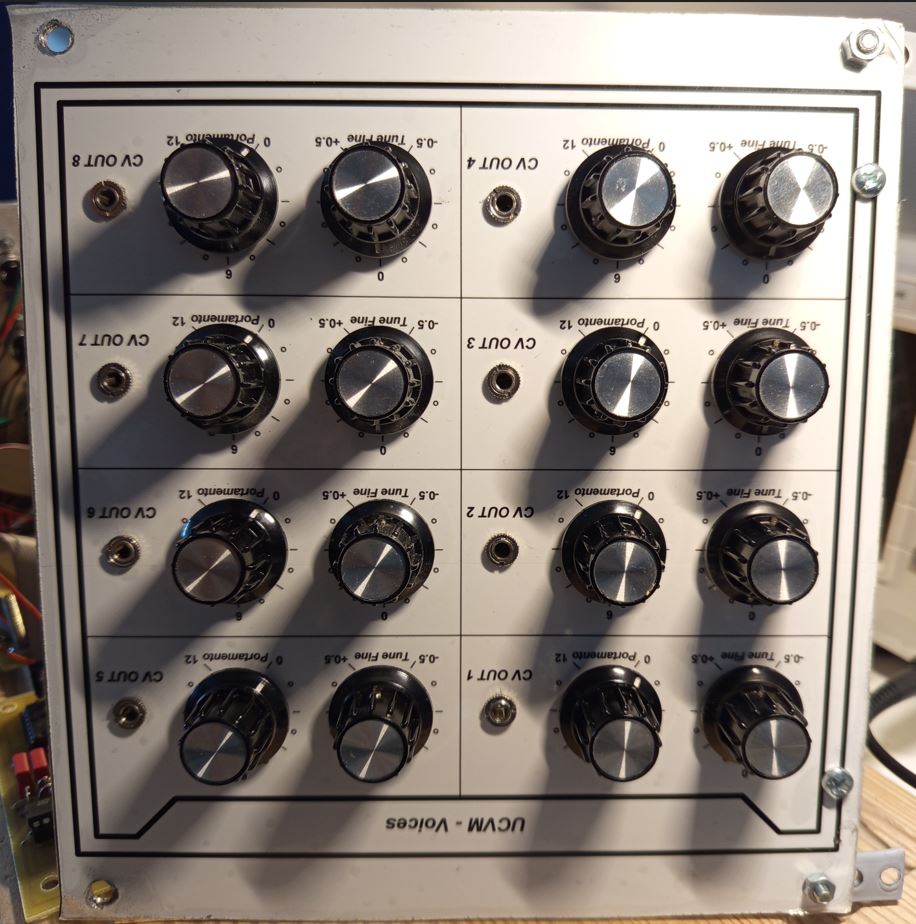
End Sticky Knob Misery!
A secondhand Arturia BeatStep, and after perhaps 10 years it had two problems…
1: All the “soft feel” plastic knobs were covered in a sticky residue.
2: The main encoder would jump & skip settings.
The first job was to remove the knobs and clean them:
An IC extractor tool worked well to pull the knobs off the D-shafts.
Many plastic parts of this vintage (2014) degrade as the plasticiser component exudes over time. Isopropyl alcohol is often good at removing this residue without disolving everthing, but test on a small area first.
And read those instructions.
To get at the dodgy encoder, I dismantled the whole unit:
I used DeoxIT D5, spraying a very small amount into the slots in the side of the encoder and wiggling the shaft back and forwards.
Again, read those instructions too.
This is the first time in my life that I got the chance to lay my hands on a piece of the Holy Grail: A defect Moog Modular 904B voltage controlled high pass filter. I had done much analysis of the Norlin service manual circuit to create my clone of the 904B, the T904B, but it is a different story to have an original on my operation desc!
The module and the modular system it normally resides in is owned by the english record producer Andy Gray-Ling, who contacted me concerning additional modules for his modular and technical questions.
When the module arrived, I tested it. It created just a heavy noise and crackling output, no input signal was processed by the filter. The reason was found quite fast, a dead PNP transistor (2N4058), which was part of the input buffer stage of the first filter pole (see above). But for exchanging it I had to disassemble the module totally, meaning in this case to spread the to board sections of the module apart. For me it felt a bit like a kind of “blutaar” (blood eagle) execution method, a sacrilege for this veteran, but was necessary.
The layouts however don’t fit to any of the circuits I know, so this is a new circuit variant for me. The boards and the components are quite corroded, but after replacing the 2N4058 the module worked perfectly again, sounds brilliant after all that decades!
The next picture shows a big noise on the output signal which occured after replacing the dead transistor. The reason seems to be a kind of ground loop, wich occurs when the front panel is removed. The noise vanishes when the front panel is mounted again. If I am right, this is poor engineering of Moog to be panel-mount-dependent for grounding!
After 16 years on duty, the control board of the PSU of my Formant Modular Synthesizer passed away
As the 723, its socket and the PCB underneath melted and baked together, nothing could be repaired, so I had to develop a new PCB for it. Same circuit, same board size, as everything shares the same free space within the keyboard enclosure together with the keyboard interface which I wanted to save in any case: It was a lot of work due to 8 voice polyphony, key velocity detection, joystick X-Y - control and MIDI monitor…