I would like to take a stab at printing some of the rails - would you mind if I have your .stl files?
1 Like
The ones I printed came from the reddit thread linked in my first post. He has the STL’s shared on github: GitHub - justinkowski/flexrack-rails: FlexRack is a system of 3D-printable, interlocking parts tha And thingiverse: Expandable Eurorack Rail System by justinkowski - Thingiverse
I liked them so much I printed up a second set to replace my original case with another using these rails instead. But…haven’t made much of any progress on my synth since February  After we adopted a new dog most of my spare time has become dog time because he’s a really high energy pup who needs lots of exercise. And by evening when I have time to work on projects I’m just too exhausted from trying to take the edge off of his energy
4 Likes
So…little follow up on how my 3D printed rails are holding up. Or…were holding up.
I spent the past weekend in Joshua Tree California at the Joshua Tree Music Festival with my daughter and some friends. Since my friend brought his trailer this time he offered space for any bigger items I wanted to bring and when I suggested brining the modular he quickly agreed.


I found that I was able to run one case of the modular, a small powered presonus studio monitor, my MB sequencer, and a keystep all off a little battery/inverter box so we has a fully off-grid modular setup going for people to play with. Quite a few people were impressed by it and had some fun learning how to make patches.
And my 3D printed parts held up just fine to the bumpy drive out there. Only issue was a lot of my jacks stared to come loose from the bumpy trailer ride.
At least for the first two days.
After we went to sleep at night I moved it into my car to make sure it didn’t disappear or get knocked over or anything. And the 3rd day I didn’t bother to pull it out of the car first thing in the morning. We wandered down to the stage area and by the time I got back to camp it was pretty warm out already. Which…the 3d printed panels and rails did not appreciate:


Pretty sure it all still works…but I haven’t had a chance to fully test all the modules yet. With the misshapen rails though modules tend to pull loose when I unplug patch cords now.
I have a second set of rails already printed that I was going to use in my next case - and reprinting the panels for the warped modules isn’t a big deal…so should be good as new after a few days of printing and transferring things around.
But word to the wise - if you use 3d Printed rails and decide to camp in the desert with your modular - don’t leave it in the car all day ![]()
15 Likes
A dali-esque modular ![]()
3 Likes
Sell 'em to this guy
3 Likes

3 Likes
I am currently trying out this model:
https://www.printables.com/model/334520-modular-eurorack-rails
It has no feedback or makes yet, but seemed well conceived by an author who made other items, so it seemed worth checking out.

The main rail modules are 28hp (smaller are available) and the corner pieces are 4hp. As you can see, their fit is wobbly until you fasten blank plates to align them. I expect to use a 3D pen to weld them straight.
The primary area of concern will be the reliability of those screw holes. I might need to fill them with a bit of putty and use wood screws. But so far, M3×8 screws are holding well those blank eurorack plates.
I have enlarged and reduced the vertical connecting pieces to also have 1U Intellijel rows and a 5U Kosmo rows. I do not own any real hardware, so it’s all designed against the specs without the real article at hand to verify the fit.
I have less interest in building eurorack or 1U, but I want this first system to eventually graduate to be a benchtop test system. The 1U row will be mostly comprised of mults converting between big and small jacks. I have already printed as much rail as you see in the photo. Considering two possible configurations (depending on spare lumber & other practical considerations):
- 120hp, 1×3U, 1×1U, 1×5U
- 92hp, 1×3U, 1×1U, 2×5U
I hope yours work out better than mine did!
1 Like
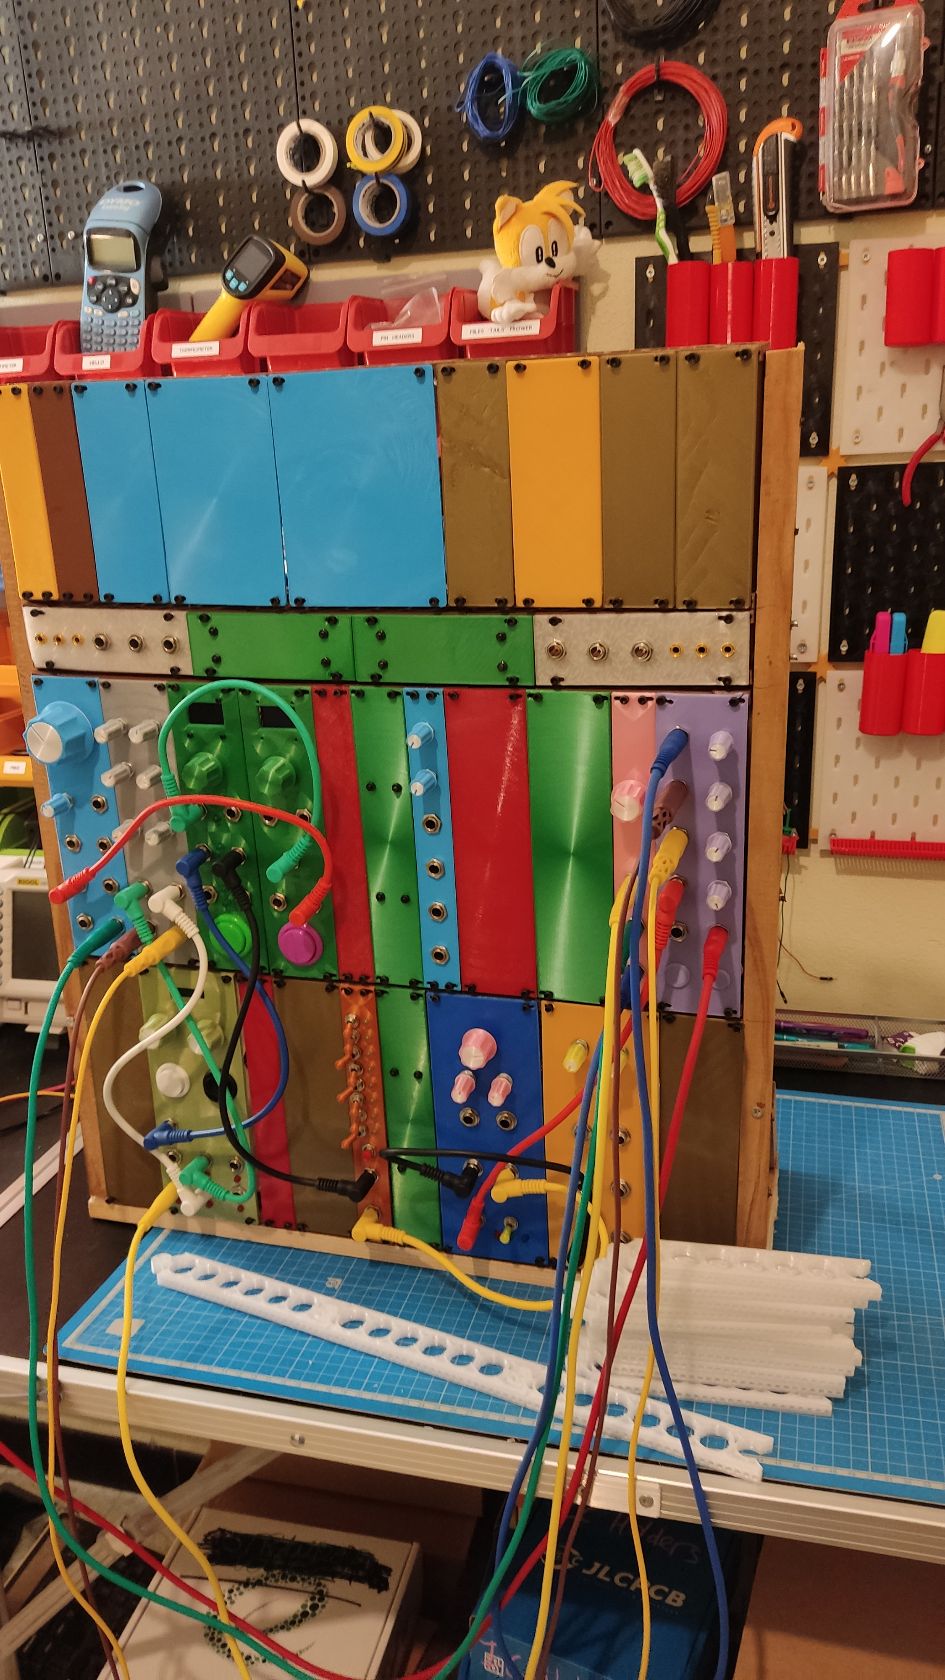
After a few days of printing, I’m done.

Before adding blank plates, their fit is wobbly. I used a toy USB 3D pen to weld together the rails in proper alignment. It’s a dirty technique that’s no stronger than hot glue, but since it will be hidden and not load-bearing, it should work out.


Putting it into a box soon! Featuring some busboard PCBs I kinda customized from open schematics, some WIP models I’ve been working on, and Tails plushie for scale.
I went with 92hp rows, using 3×28hp + 2×4hp end pieces. There are two 5U (Kosmo) rows, one 1U (Intellijel) row, and one 3U (Eurorack) row.
I focus on building Kosmo, and no not own any commercial modular hardware at all, but it will let me have a little universal case if such gear passes through my hands. For now, the 1U tiles will be used for mults that convert between small and big jacks, and the 3U will probably be for projects where it’s easy to acquire cheap sets of PCBs.

It has no feedback on printables yet, but it’s been a good system! I’ll share feedback with the author once it’s mounted in a proper case.
4 Likes
I never updated directly in this specific thread even if I posted my build a lot about in other threads, so I should post here:
I’ve built with this rail system a minimal armature using spare reclaimed lumber and worst carpentry “tools” I could possibly find, and it has held strong. I had no issues with misalignment or screw holes not holding things properly. Repositioning things and reusing holes hasn’t been an issue, although I don’t imagine I ever reused a single hole more than 5 times yet.
The back of the armature is a mess:

I care about strength more than aesthetics for this armature, since it’s my machine for testing stuff. But I’d like to build a proper case soon, and I was thinking of making its sides out of clear material like plexiglas or polycarbonate, to proudly show off its DIY nature.

This system has held strong, so I’ll give it a chance again, with only two small modifications:
first, I’m printing it in PETG rather than PLA, for increased strength (at the cost of a nastier-looking finish), and second, I’m printing it with a brim (a bit hard to see in this photo, since it’s only one layer high and this filament is translucent).
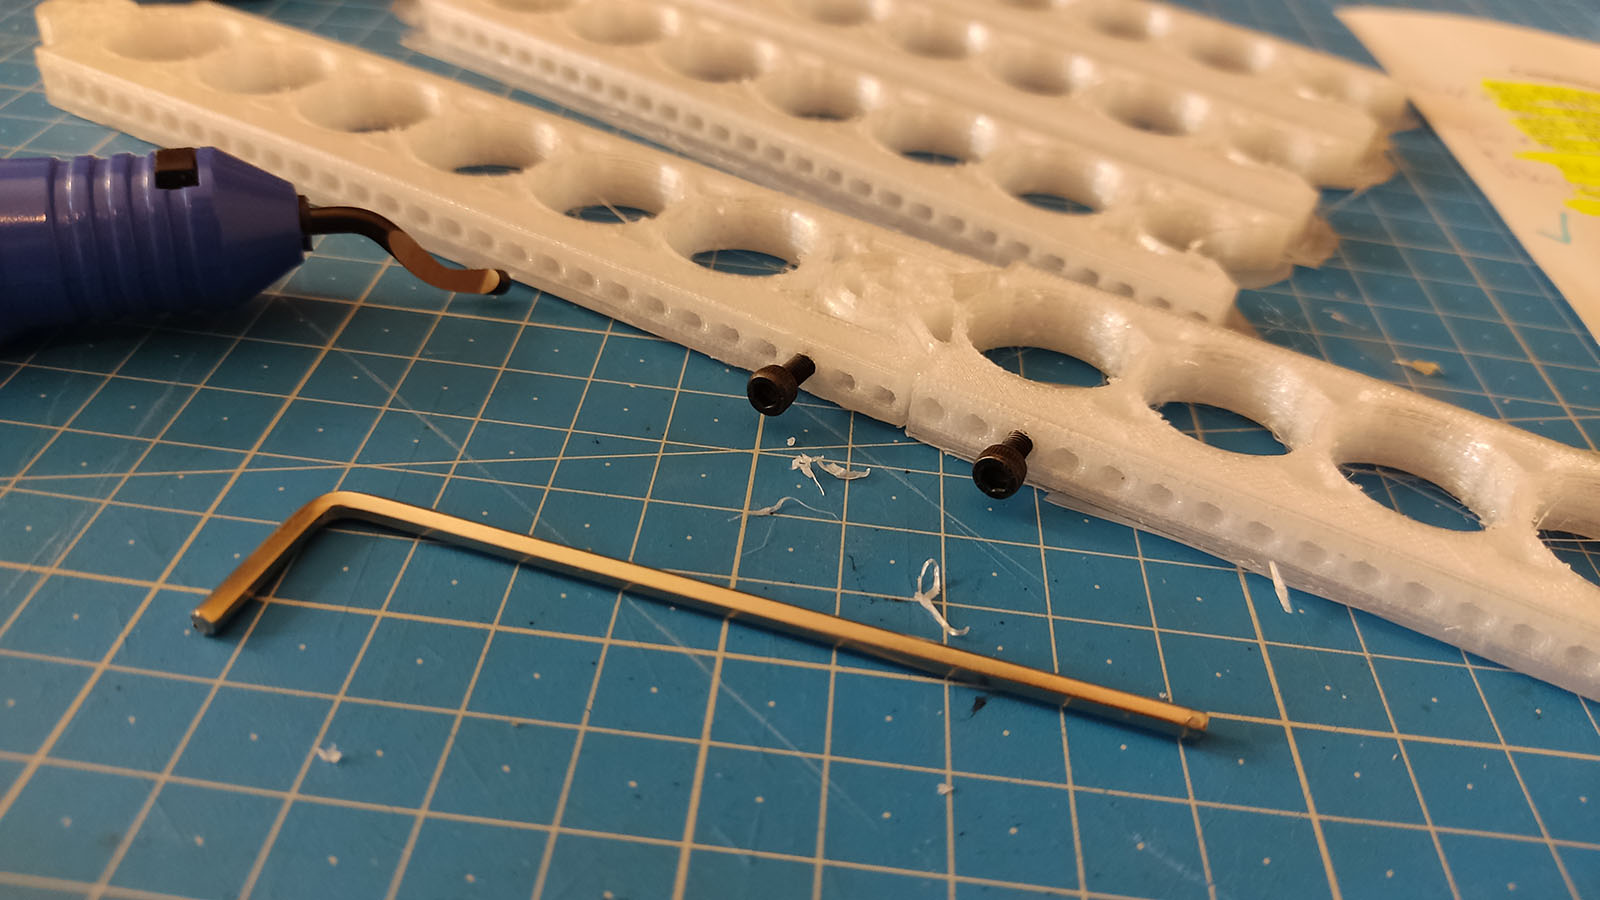
That means more work to post-process it. A deburring tool with a hooked blade that can freely rotate (depicted) is invaluable: with it, it takes only two minutes to process one rail. Due to being PETG, I’m printing them slow: it takes 4 hours per, or 20 hours for a platter of 5. And because it’s such a long print, without a brim, I have way too much warping, and no warping is acceptable on such a piece.
Time to print about 60 more rails.
5 Likes
Seeing your stuff makes me want to get a bigger print bed. The ender 3 I have is just a touch too small for kosmo sized panels, and I worry about vertical printing.
1 Like
A 200 mm panel will fit on an Ender 3 bed, barely — you have to set adhesion to none (rather than skirt) though.
I don’t like 3D printed panels but I’ve done a couple as stand-ins for later FR4 ones.
2 Likes
Are you sure it’s too small? I have the V2, which has the smallest of the bed sizes shared by many models in the Ender 3 series, at 220×220. I even print them with a brim. I have to skip the skirt, and physically arrange the bed clips judiciously, however.
BTW, I have documented a lot of the knowledge I acquired the hard way about printing quality panels in the documentation of Synth Printer
5 Likes
Love seeing more 3D printed synth stuff!
Sadly my synth is still a melted pile waiting for me to repair it a year later. And I still plan on redoing it with 3D prints - just won’t make the mistake of leaving it in my car in the desert again ![]()
Kosmo panels should fit on an ender 3 for sure…it’s tight…but should fit. I did all my panels on my Prusa i3 mk3 printed face down with no brim…I did have one or two that slightly lifted a corner most stuck no problem on my textured print bed. And I definitely like the look of the textured bed and how it hides the layer lines. But - I also went “extra” with using my MMU to print labels (though that also limited me since I had to stick with thick bold fonts and sometimes shorten labels more than I’d like to make them fit and be legible.)
I did finally buy wood for a new case and I have printed new rails. Just need to find time to actually cut that wood and build a new case…then…reprint all my melted panels. Definitely been feeling the itch to melt more solder and make more bleeps lately so hopefully I’ll make some progress over the summer.
I can print fine on my ender 3. I dont exactly ‘love’ the look of them, but they are serviceable enough.

These are sprayed with a few coats of automotive filler primer, sanded, and painted with plain wall paint.
On a related note, I just bought a cricut so maybe after I slap some gold chrome labeling on them…
1 Like
Well dang maybe I should just try again then lololol
2 Likes
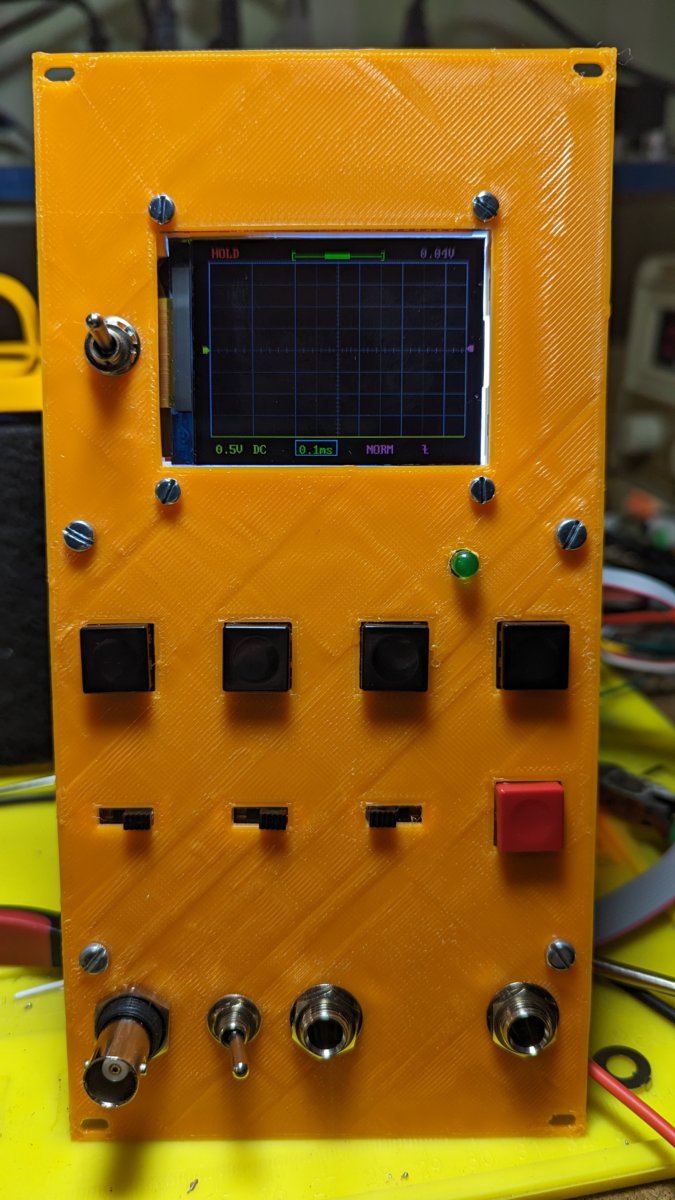
Bad idea, or terrible idea?


(Do not worry, if the build is successful, I will be certain to deface the art.)
5 Likes
I do love these rails! I have so many boxes to populate. A great idea!
I mean to tackle a number of panels as soon as my printers are back on-line. I do like your non-gui aproach though its beyond me at the moment i can see how uesful it could be to have in my maker arsenal. Thanks.
1 Like